BeagleY-AI Quick Start#
What’s included in the box?#
When you purchase a BeagleY-AI, you’ll get the following in the box:
2.4GHz antenna
Quick-start card
Todo
Attaching antennas instructions for BeagleY-AI
Todo
BeagleY-AI unboxing video
Getting started#
To get started your BeagleY-AI you need the following:
MicromicroSD card (32GB)
You may need additional accessories based on the mode of operation, you can use your BeagleY-AI in different ways.
Easiest option is to connect the board directly to your PC or Laptop using a USB type-C to type-c cable. There is only one USB type-C port on board, if you choose to use a dedicated power supply for first time setup, you may choose to access the board via any other methods listed above.
Power Supply#
To power the board you can either connect it to a dedicated power supply like a mobile charger or a wall adapter that can provide 5V ≥ 3A. Checkout the docs power supply page for power supply recommendations.
Note
Instead of using a power supply or power adapter if you are using a Type-C to Type-C cable to connect the board to your laptop/PC then make sure it can supply at least 1000mA.
Boot Media (Software image)#
Todo
Update this section to use latest boot media (software image) for BeagleY-AI.
Download the boot media from https://www.beagleboard.org/distros/beagley-ai-xfce-12-5-2024-06-10 and flash it on a micro microSD card using using Balena Etcher following these steps:
Select downloaded boot media
Select microSD card
Flash!
Tip
For more detailed steps checkout the Getting Started Guide under support section of the documentation.
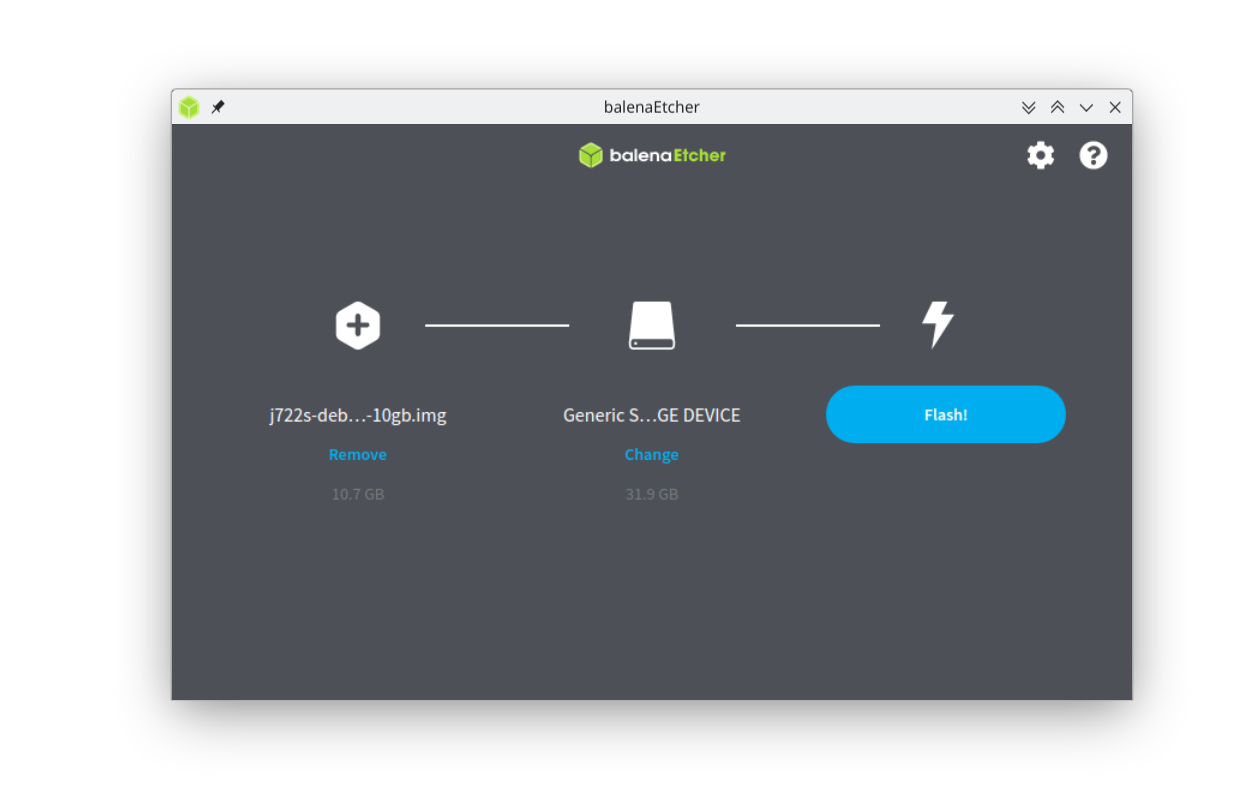
Fig. 13 Flashing BeagleY-AI boot image (software image) to microSD card#
Once the microSD card is flashed you should see BOOT and rootfs mounted on your system as shown in image below,
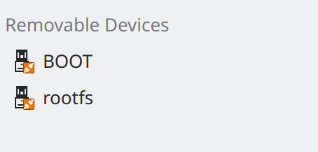
Fig. 14 Flashed microSD card mounted partitions#
Under BOOT partition open sysconf.txt to edit login username and password.
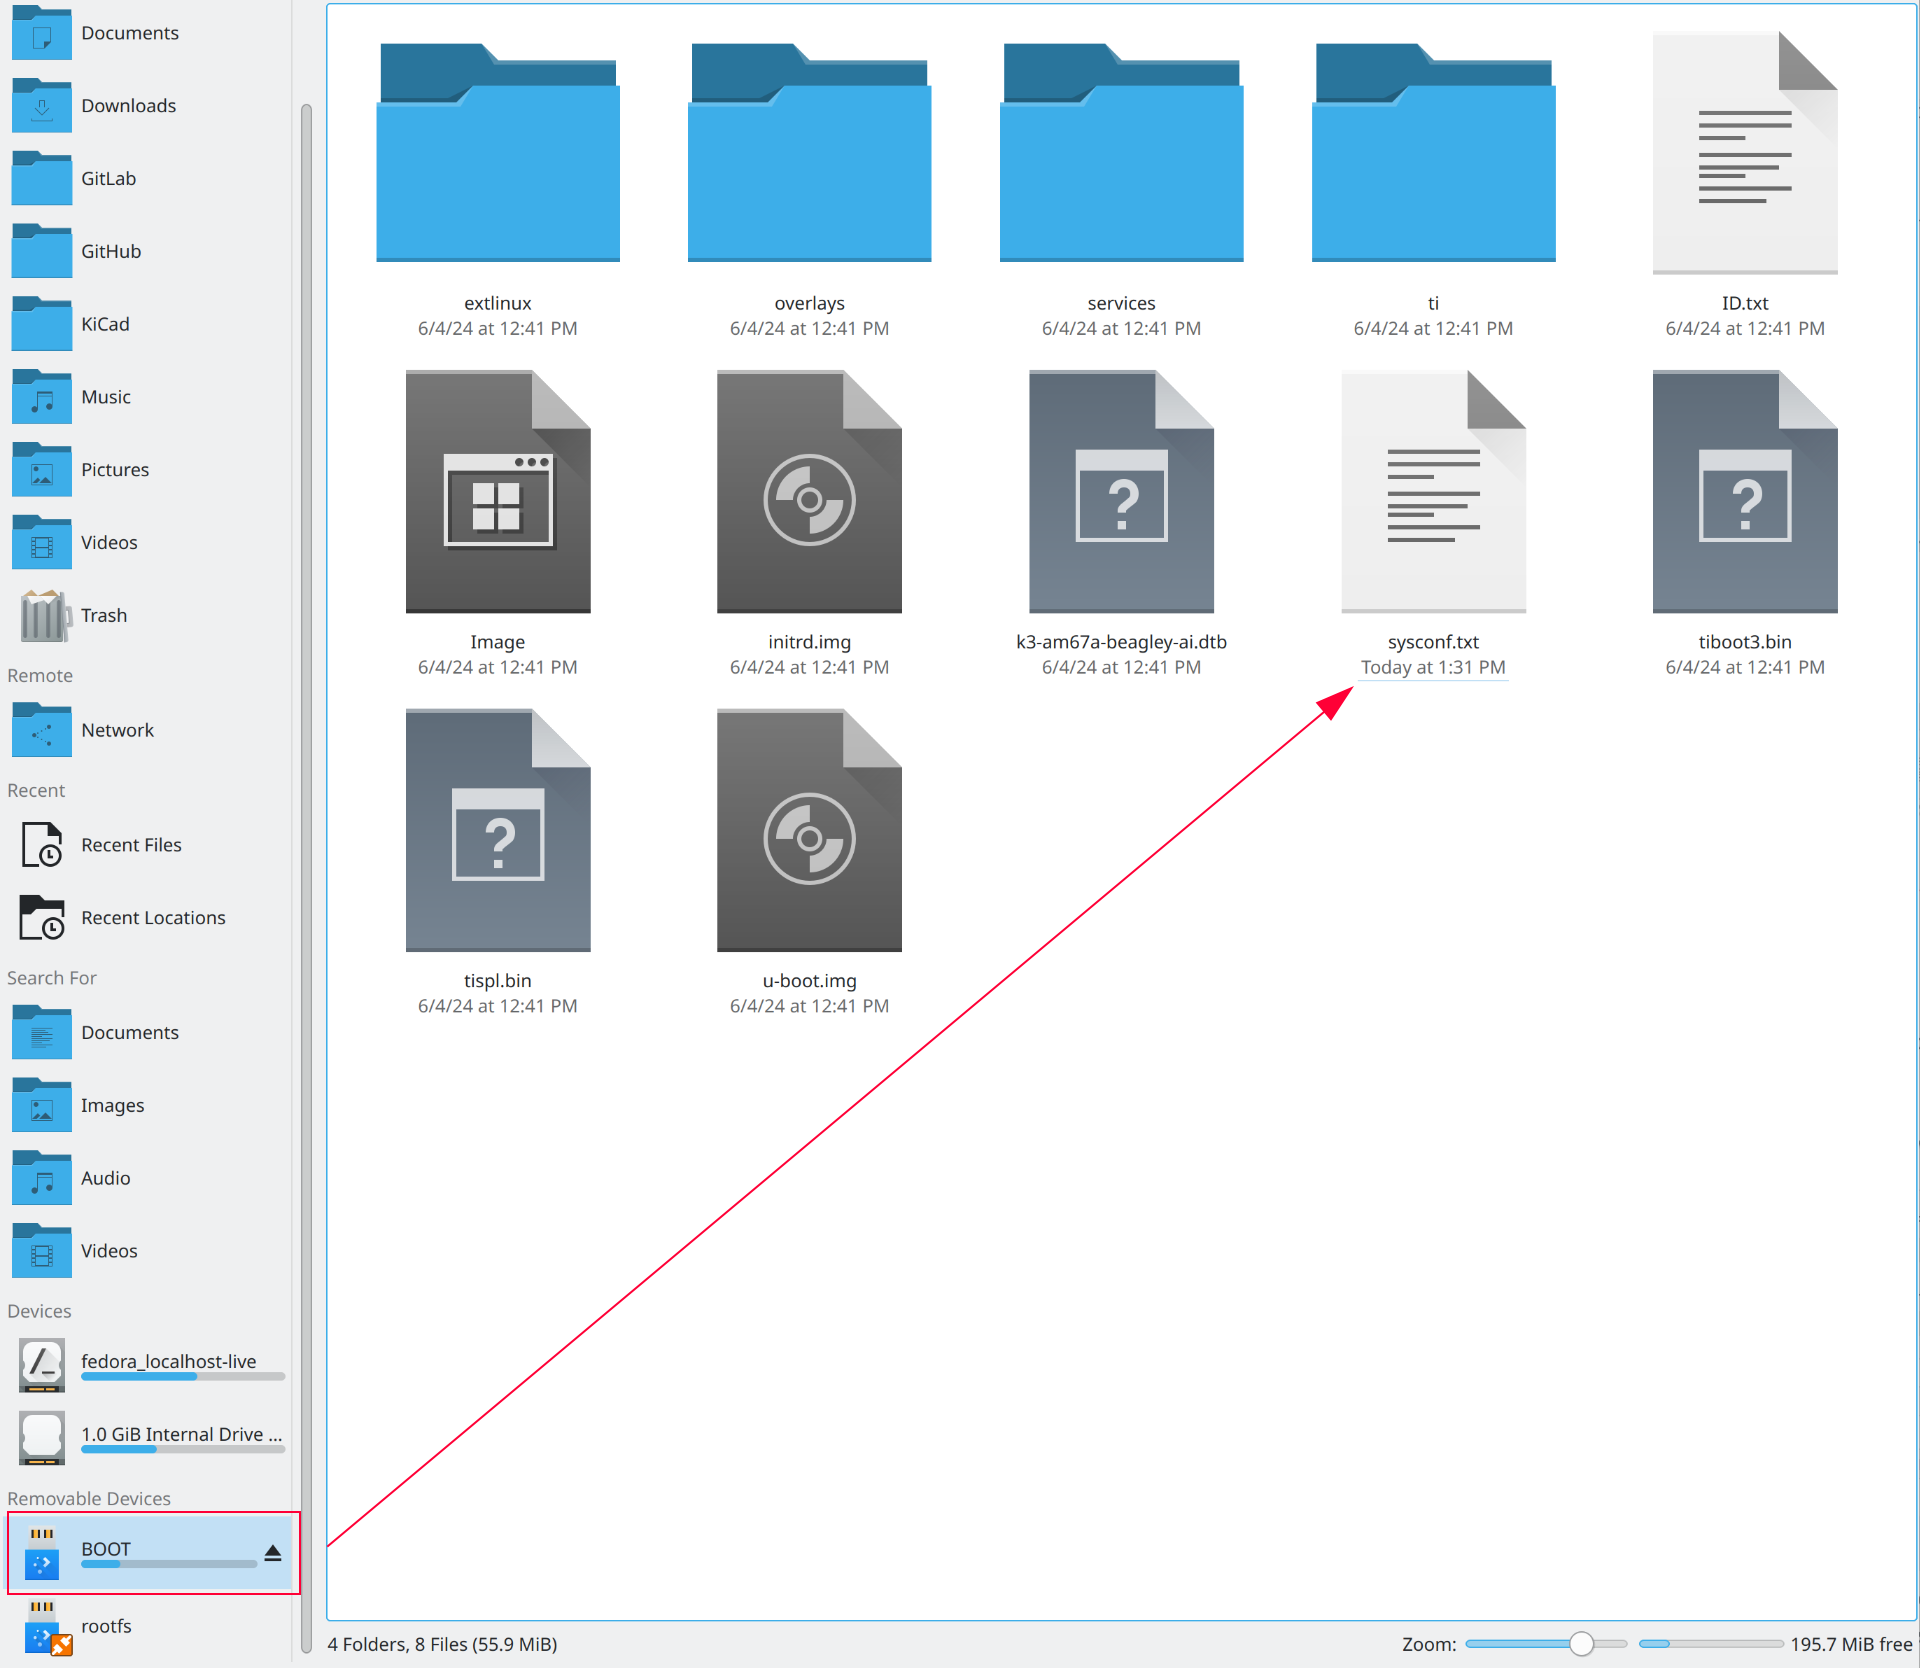
Fig. 15 sysconf file under BOOT partition#
In sysconf.txt file you have to edit the two lines highlighted below.
29# user_name - Set a user name for the user (1000)
30#user_name=beagle ①
31
32# user_password - Set a password for user (1000)
33#user_password=FooBar ②
① If boris is your username, update #user_name=beagle to user_name=boris
② If bash is your password, update #user_password=FooBar to user_password=bash
Note
Make sure to remove # from in front of these lines else the lines will still be
interpreted like a comment and your username & password will not be updated.
Once username and password are updated, you can insert the microSD card into your BeagleY-AI as shown in the image below:
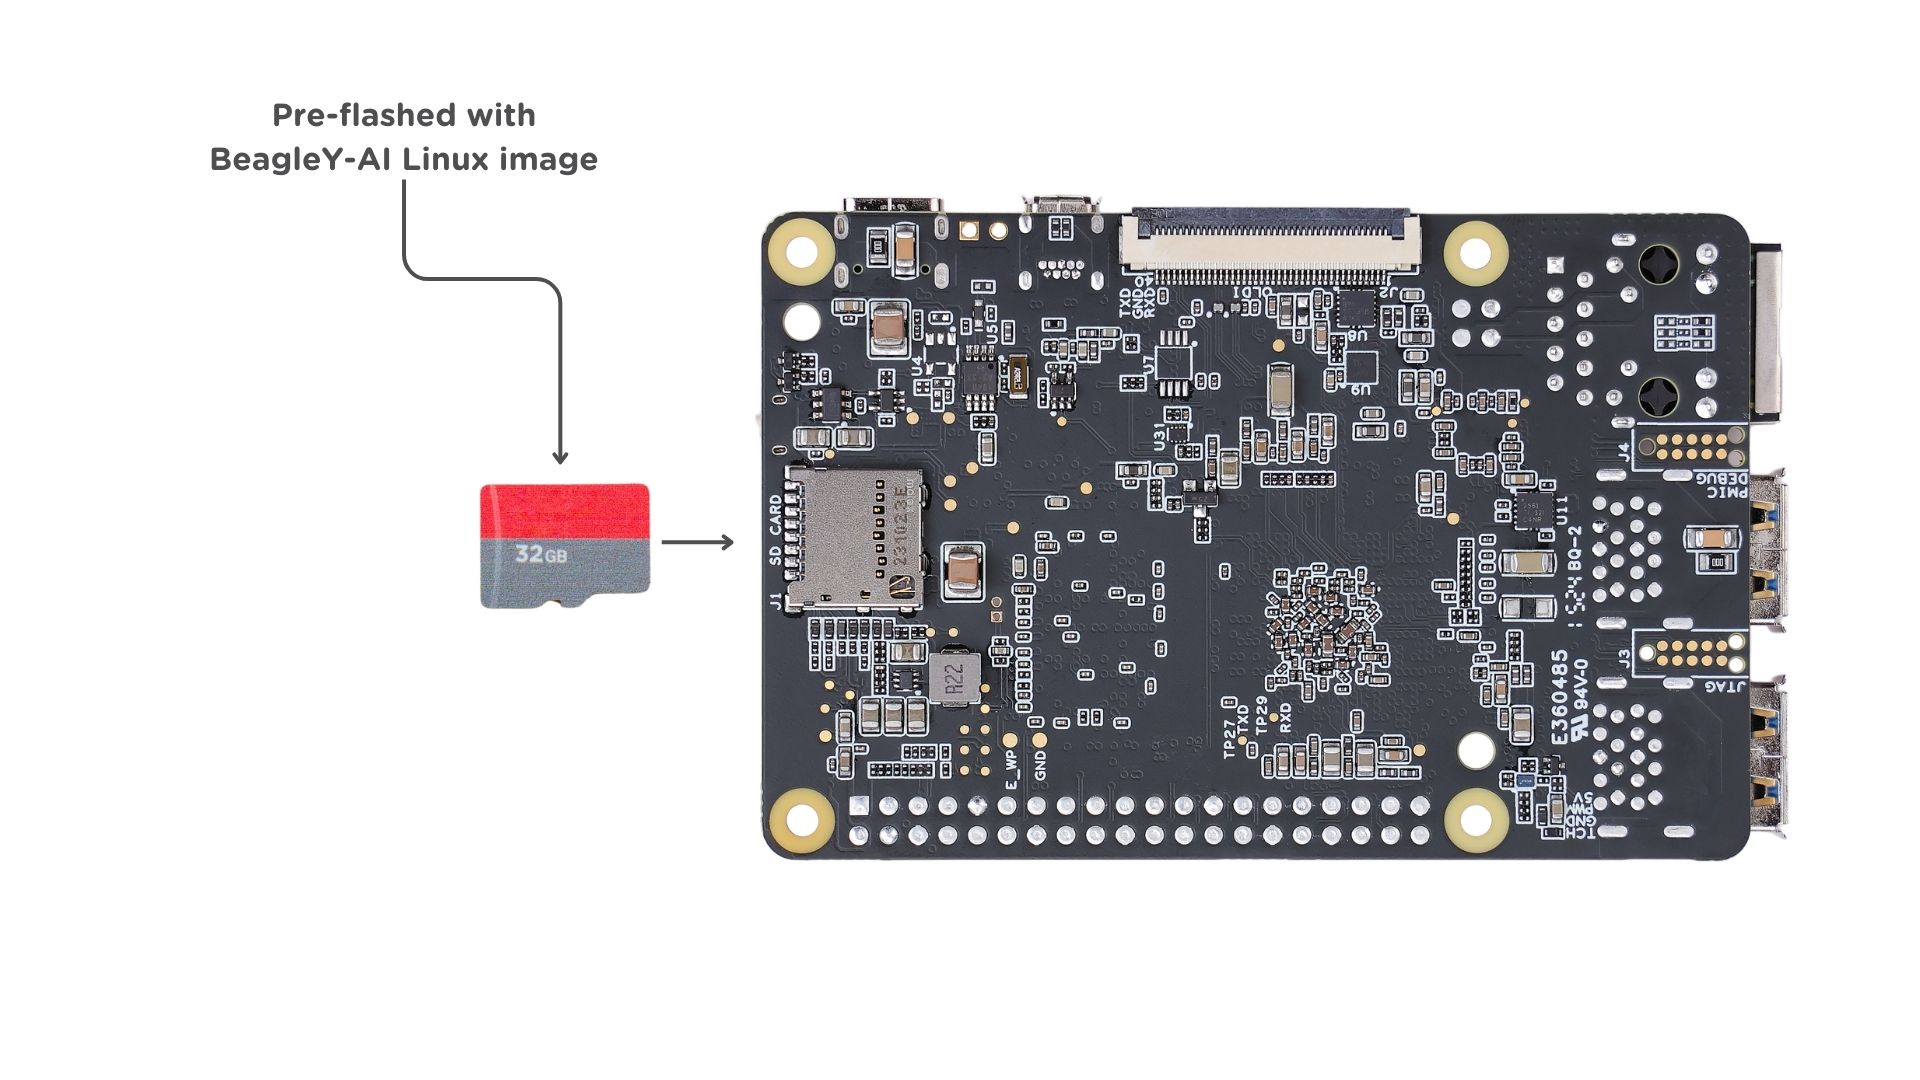
Fig. 16 Insert microSD card in BeagleY-AI#
USB Tethering#
Note
If you are using the board with a fan or running a computationally intensive task you should always power the board with a dedicated power supply that can supply 5V ≥ 3A (15W+).
As per USB standards these are the current at 5V that each downstream USB port type can (max) supply:
USB Type-A 3.x port - 900mA (4.5W)
USB Type-C 1.2 port - 1500mA (7.5W) to 3000mA (15W)
Thus it’s recommended to use type-C to type-C cable.
To initially test your board, you can connect the board directly to your computer using a type-C to type-C cable shown in the image below.
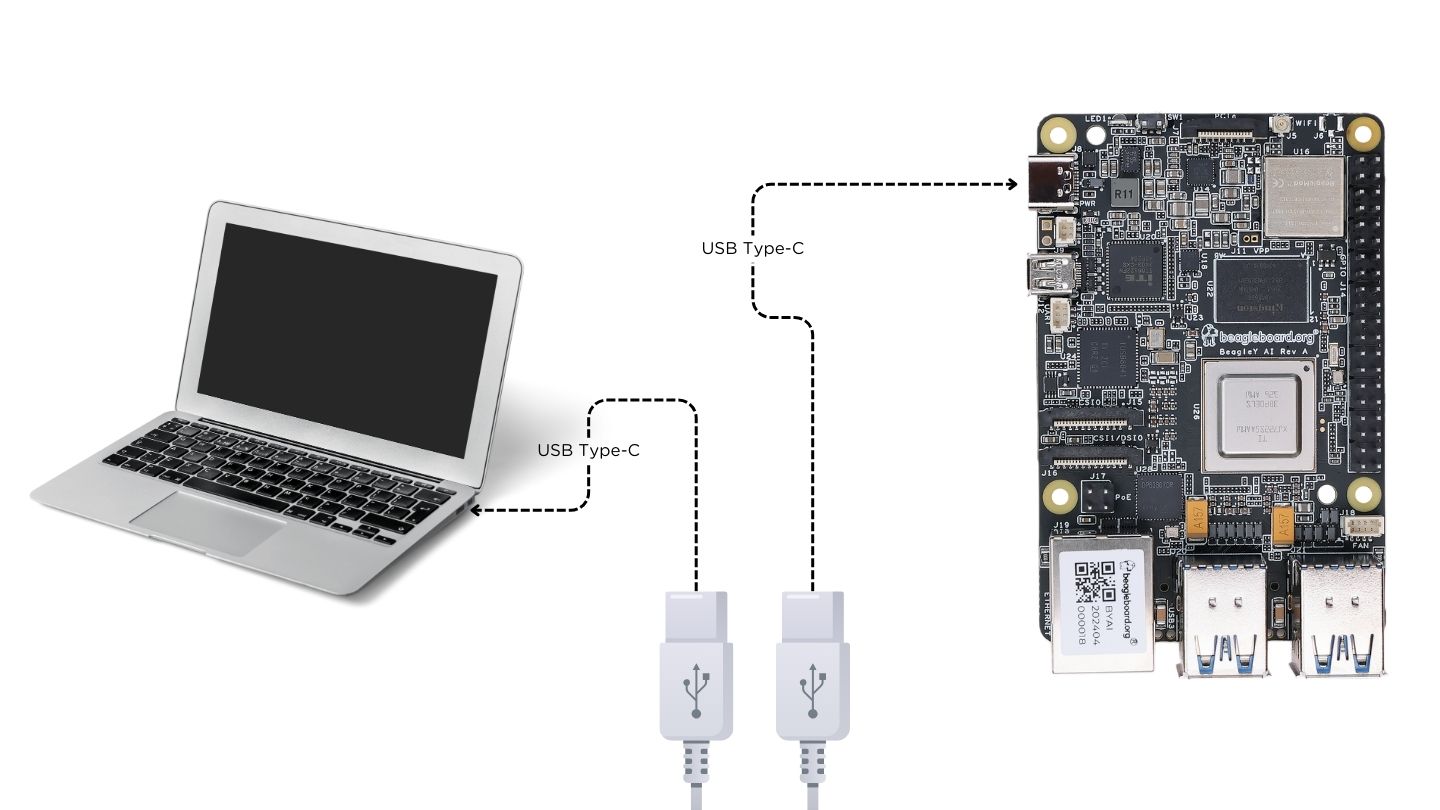
Fig. 17 BeagleY-AI tethered connection#
SSH connection#
After connecting, you should see the power LED glow, and soon just like with other Beagles, BeagleY-AI will create a virtual wired connection on your computer. To access the board, open up a terminal (Linux/Mac) or command prompt (Windows) and use the SSH command as shown below.
ssh debian@192.168.7.2
Tip
If you are not able to find your beagle at 192.168.7.2 make sure to checkout Browse to your Beagle to resolve your connection issue.
Important
If you have not updated your default username and password during Boot Media (Software image), you must update the default password at this step to something safer.
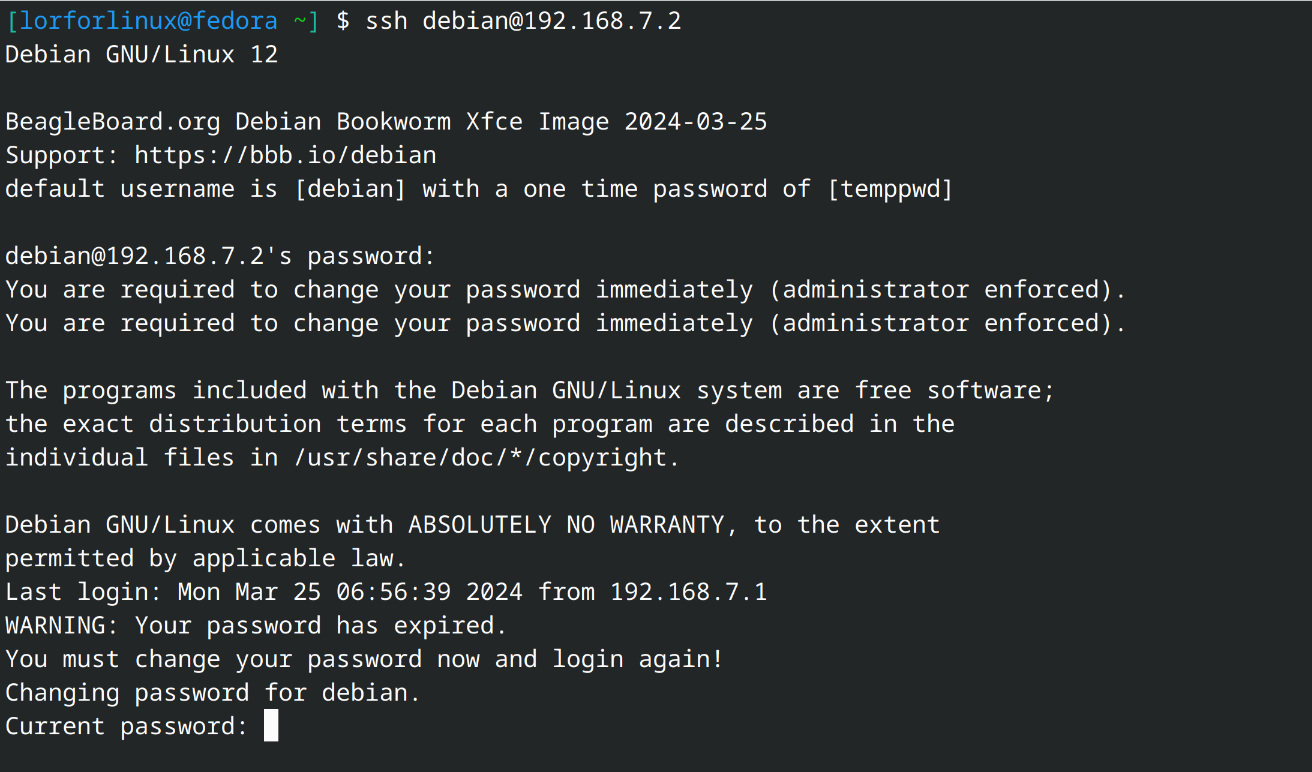
Fig. 18 BeagleY-AI SSH connection#
UART connection#
Your BeagleY-AI board creates a UART connection (No additional hardware required) when tethered to a Laptop/PC which you can access using Putty of tio.
On a linux machine it may come up as dev/ttyACM*, it will be different for Mac and Windows operatig systems. To find serial port for your system you can checkout
this guide.
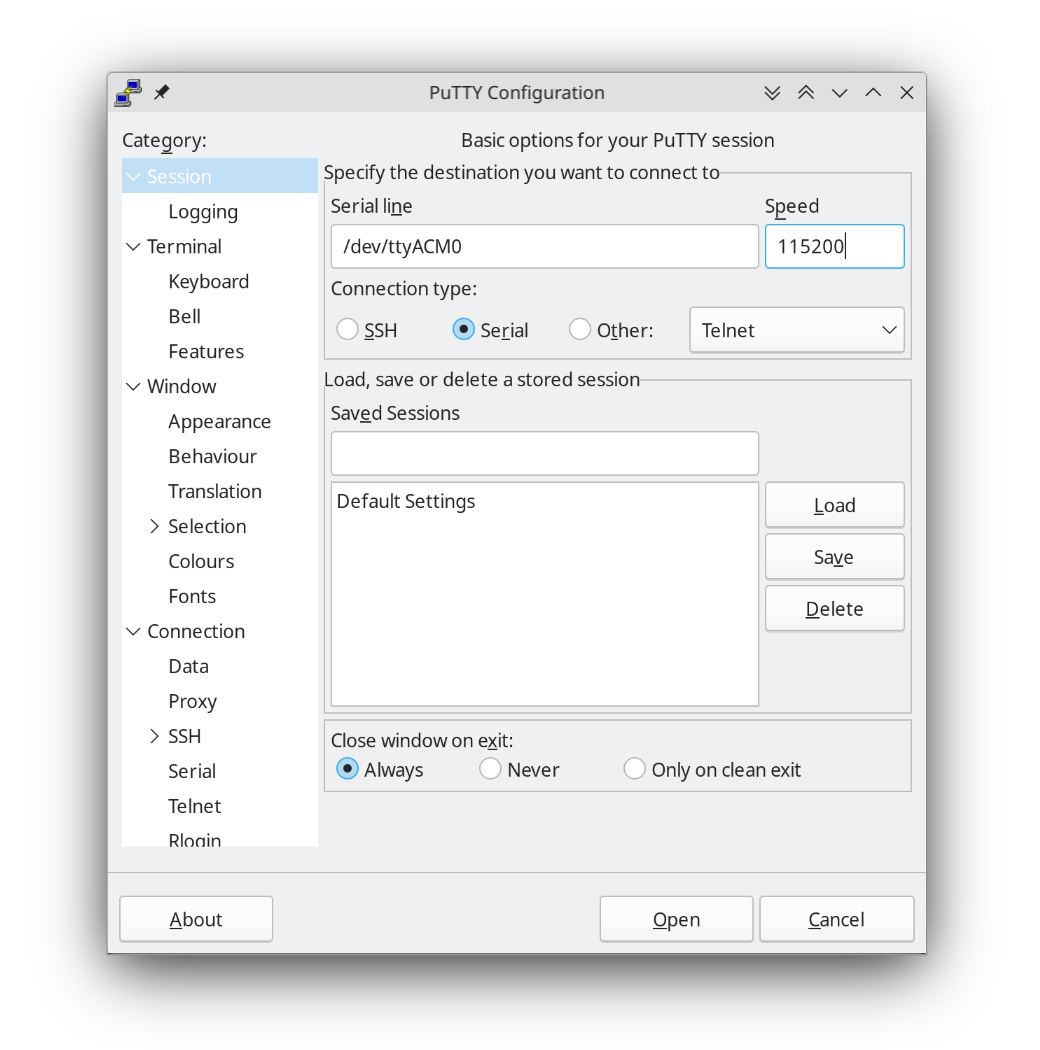
Fig. 19 Putty serial connection#
If you are on linux, try
tiowith default setting using command below,
tio /dev/ttyACM0
With this you have the access to BeagleY-AI terminal. Now, you can connect your board to WiFi, try out all the cool demos and explore all the other ways to access your BeagleY-AI listed below.
Headless connection#
If you want to run your BeagleY-AI in headless mode, you need Raspberry Pi Debug Probe or similar serial adapter.
Todo
Add images and description for this section.
Standalone connection#
To setup your BeagleY-AI for standalone usage, you need the following additional accessories,
HDMI monitor
micro HDMI to full-size HDMI cable
Wireless keyboard & mice combo
Ethernet cable (Optional)
Make sure you have the microSD card with boot media (software image) inserted in to the BeagleY-AI. Now connect,
microHDMI to BeagleY-AI and full size HDMI to monitor
keyboard and mice combo to one of the four USB port of BeagleY-AI
Power supply to USB type-c connector of BeagleY-AI
The connection diagram below provides a clear representation of all the connections,
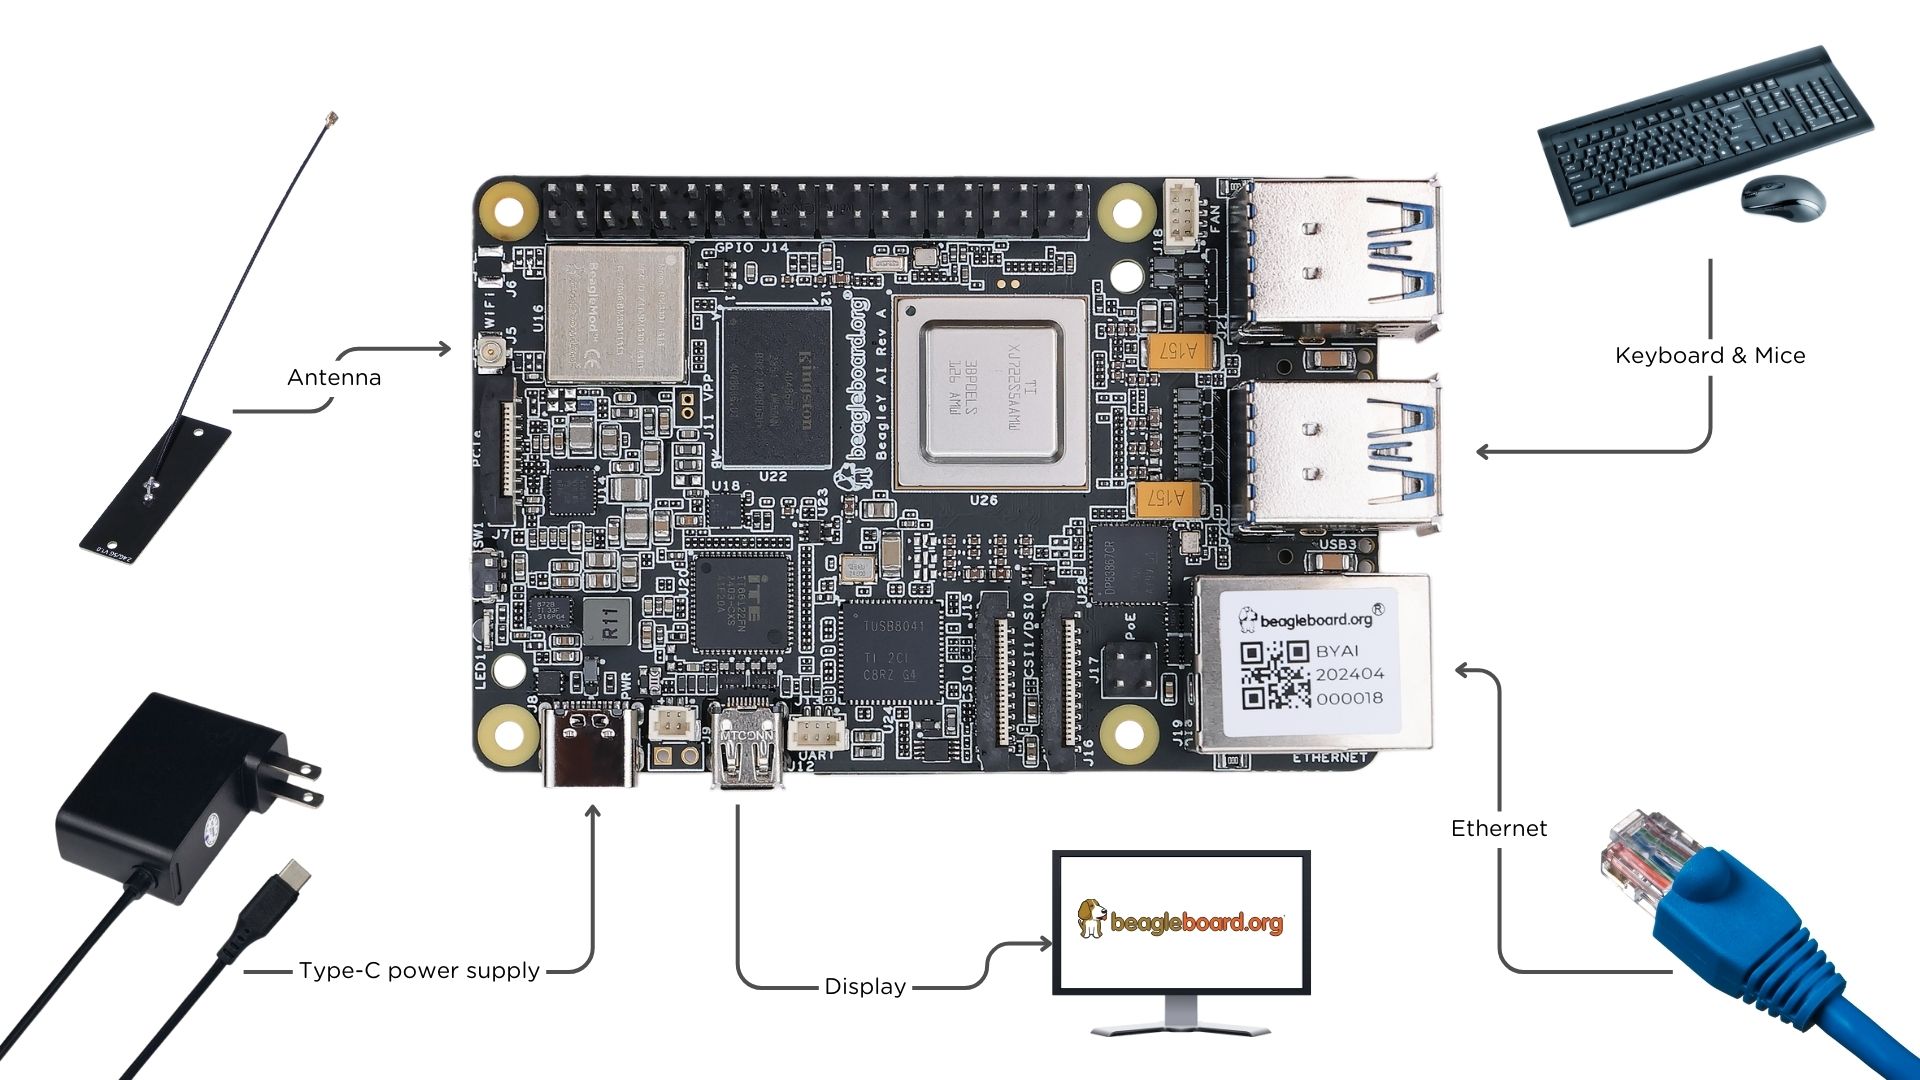
Fig. 20 BeagleY-AI standalone connection#
If everything is connected properly you should see four penguins on your monitor.

Fig. 21 BeagleY-AI boot penguins#
When prompted, log in using the updated login credentials you updated during the USB tethering step.
Important
You can not update login credentials at this step, you must update them during boot media (software image) micrSD card flashing or USB tethering step!
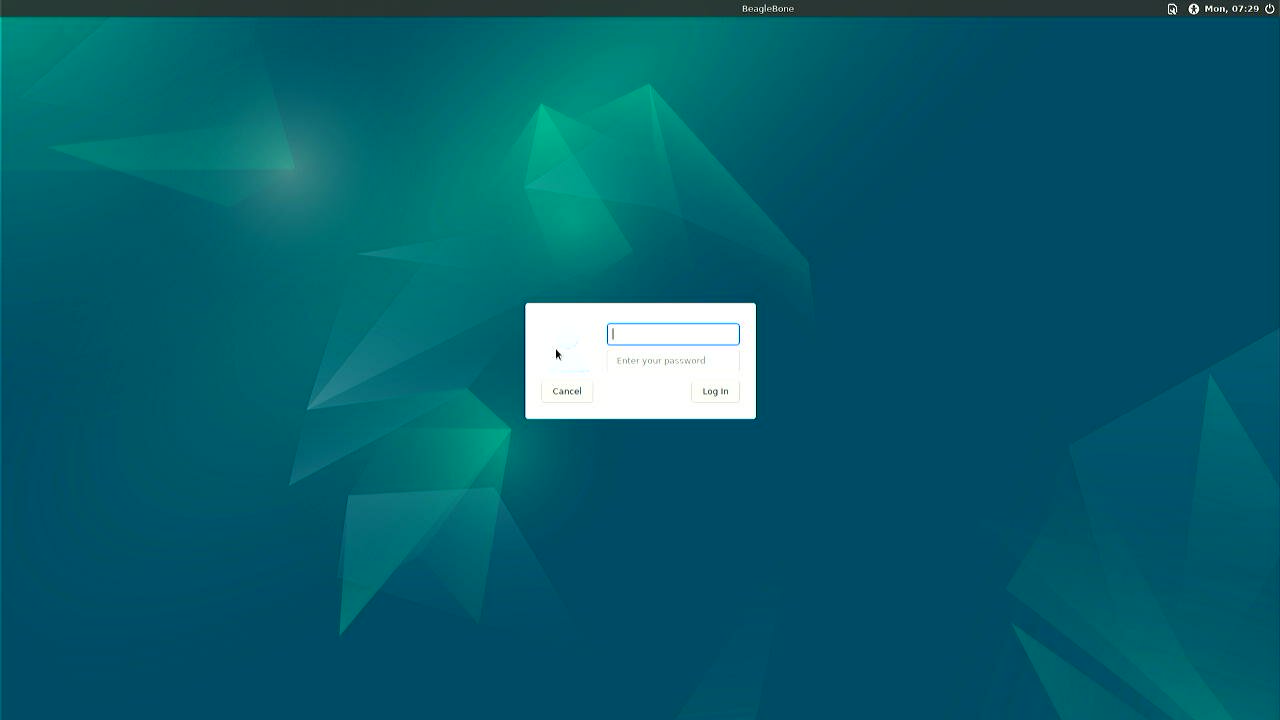
Fig. 22 BeagleY-AI XFCE desktop login#
Once logged in you should see the splash screen shown in the image below:
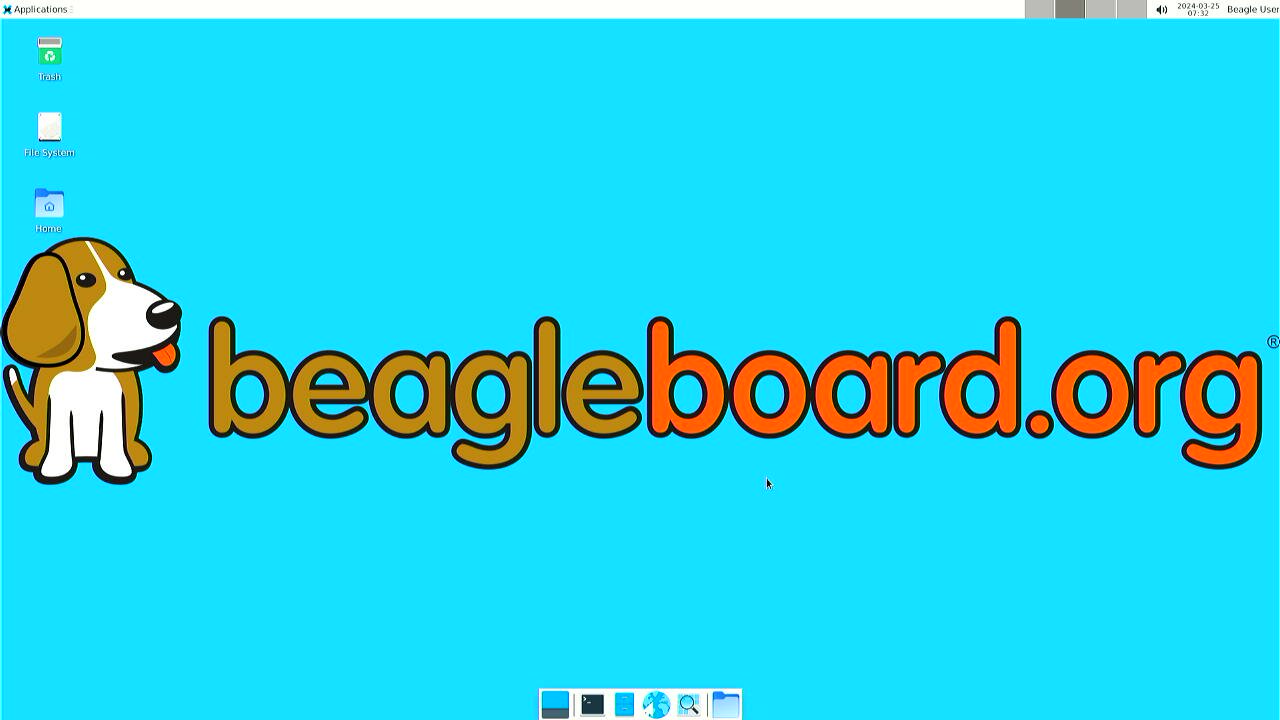
Fig. 23 BeagleY-AI XFCE home screen#
Test network connection by running ping 8.8.8.8
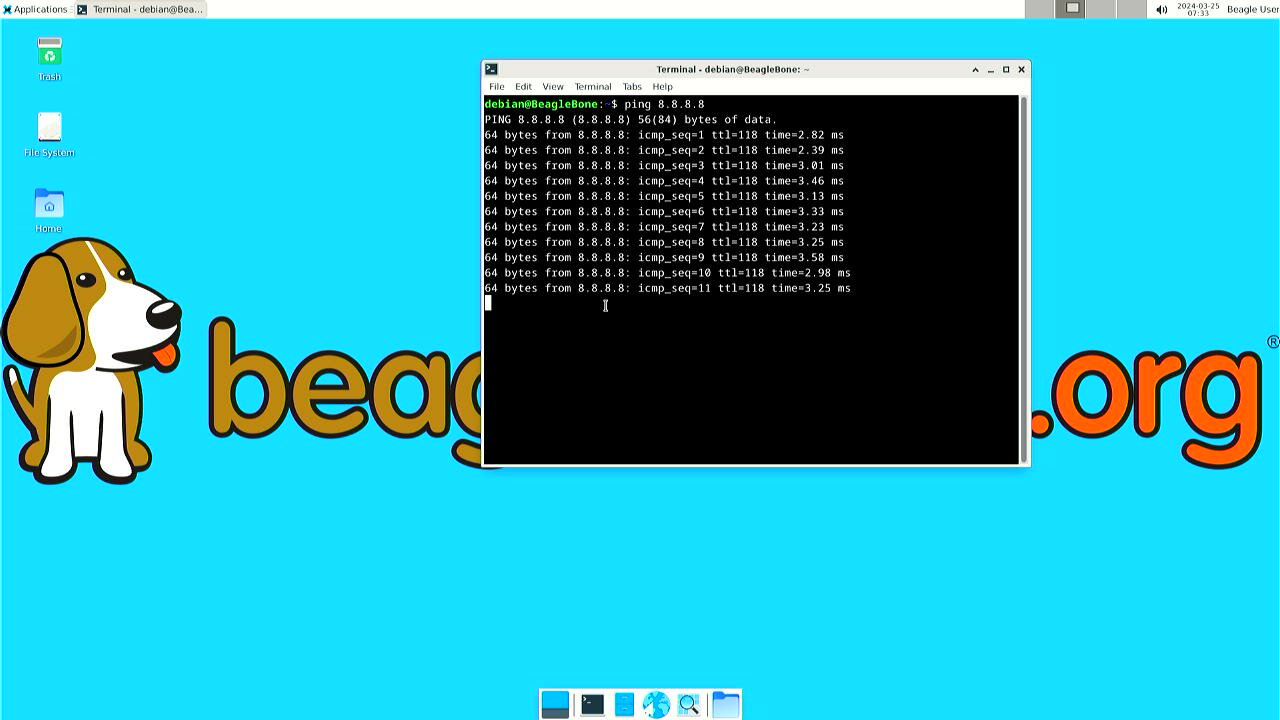
Fig. 24 BeagleY-AI network ping test#
Explore and build with your new BeagleY-AI board!
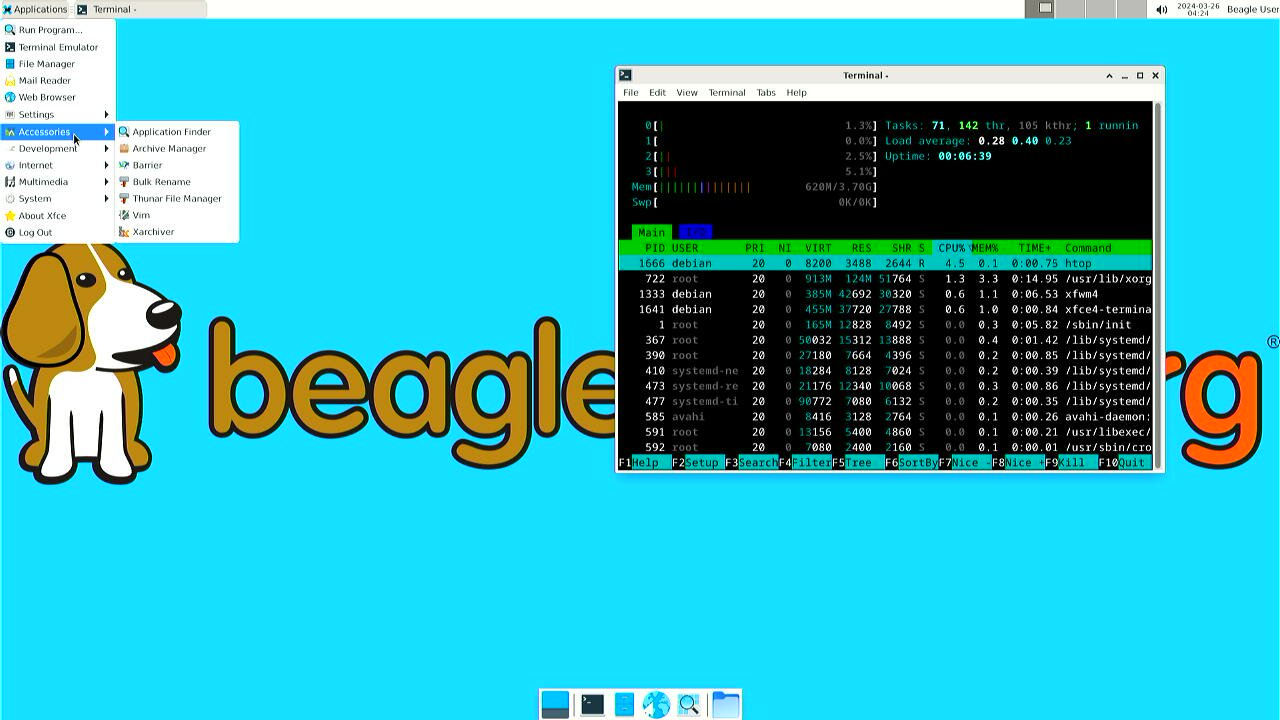
Fig. 25 BeagleY-AI running htop#
Connecting to WiFi#
We have two options to connect to WiFi,
nmtui#
Enable
NetworkManager
sudo systemctl enable NetworkManager
Start
NetworkManager
sudo systemctl start NetworkManager
Start
nmtuiapplication
sudo nmtui
To navigate, use the
arrow keysor pressTabto step forwards and pressShift+Tabto step back through the options. PressEnterto select an option. TheSpace bartoggles the status of a check box.You should see a screen as shown below, here you have to press
EnteronActicate a connectionoption to activate wired and wireless connection options.
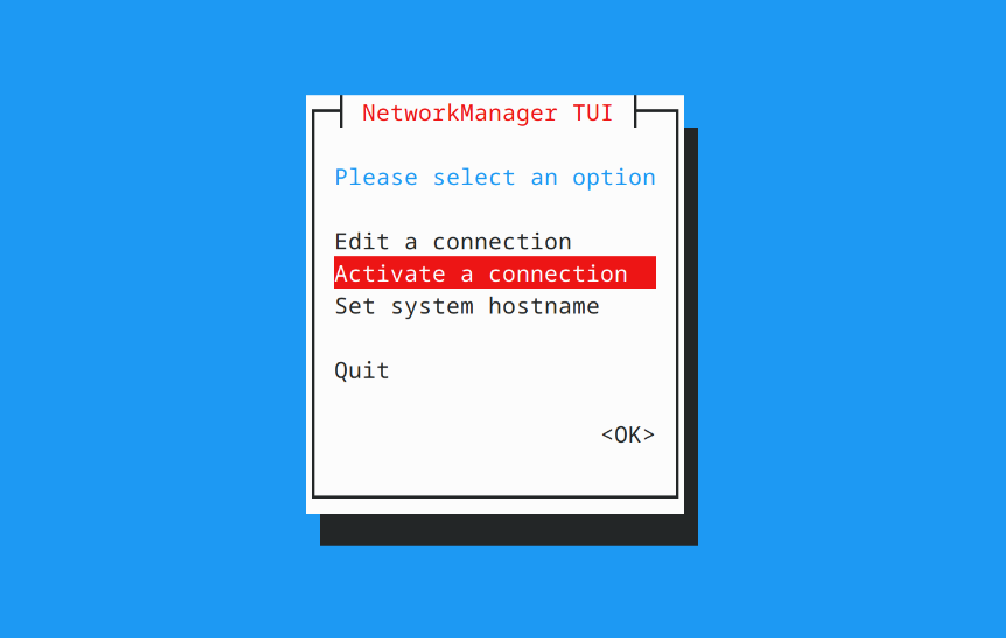
Fig. 26 NetworkManager TUI#
There under WiFi section press Enter on desired access point and provide password to connect. When successfully connected press Esc to get out of the nmtui application window.
iwctl#
Once board is fully booted and you have access to the shell, follow the commands below to connect to any WiFi access point,
To list the wireless devices attached, (you should see wlan0 listed)
iwctl device list
Scan WiFi using,
iwctl station wlan0 scan
Get networks using,
iwctl station wlan0 get-networks
Connect to your wifi network using,
iwctl --passphrase "<wifi-pass>" station wlan0 connect "<wifi-name>"
Check wlan0 status with,
iwctl station wlan0 show
To list the networks with connected WiFi marked you can again use,
iwctl station wlan0 get-networks
Test connection with ping command,
ping 8.8.8.8
Attach fan#
Todo
add instructions to attach raspberrypi official fan.
