Connect WiFi#
Note
A common issue experienced by users when connecting to Wireless networks are network names that include special characters such as spaces, apostrophes etc, this may make connecting to your network more difficult. It is thus recommended to rename your Wireless AP to something simpler. For Example - renaming “Boris’s Wireless Network” to “BorisNet”. This avoids having to add special “escape” characters in the name. This shows up especially if you try connecting to iPhone/iOS HotSpots, where the network name is the device name, which by default is something like “Dan’s iPhone”. Also see this potential solution..
If you have a monitor and keyboard/mouse combo connected, the easiest way is to use wpa_gui.
Alternatively, you can use wpa_cli instructions over a shell connection through:
The serial console,
VSCode or
sshover a USB network connection,VSCode or
sshover an Ethernet connection,VSCode or
sshover BeaglePlay WiFi access point, or
Once you have a shell connection, follow the wpa_cli instructions.
BeaglePlay WiFi Access Point#
Running the default image, your BeaglePlay should be hosting a WiFi access point with the SSID “BeaglePlay-XXXX”, where XXXX is selected based on a hardware identifier on your board to try to increase the chances it will be unique.
Tip
The “XXXX” will be a combination of numbers and the letters A through F.
Note
At some point, we plan to introduce a captive portal design that will enable using your smartphone to provide BeaglePlay local WiFi login information. For now, you’ll need to use a computer and
Step 1. Connect to BeaglePlay-XXXX#
Tip
The password is either “BeaglePlay” or “BeagleBone” and the IP address will be 192.168.8.1.
Whatever your computer provides as a mechanism for searching for WiFi access points and connecting to them, just use that. You will want to have DHCP enabled, but that is the typical default. Connect to the “BeaglePlay-XXXX” access point and use the password “BeaglePlay” or “BeagleBone”.
Note
The configuration for the access point is in the file system at /etc/hostapd/hostapd.conf.
Once your are connected to the access point, BeaglePlay should provide your computer an IP address and use 192.168.8.1 for itself. It should also be broadcasting the mDNS name “beagleplay.local”.
Step 2. Browse to 192.168.8.1#
Once you have connected to the access point, you can simply open VSCode by browsing to https://192.168.8.1:3000.
Within VSCode, you can press “CTRL-`” to open a terminal session to get access to a shell connection.
You could also choose to ssh into your board via ssh debian@192.168.8.1 and use the password temppwd.
Important
Once logged in, you should change the default password using the passwd command.
wpa_gui#
Simplest way to connect to WiFi is to use wpa_gui tool pre-installed on your BeaglePlay.
Follow simple steps below to connect to any WiFi access point.
Step 1: Starting wpa_gui#
You can start wpa_gui either from Applications > Internet > wpa_gui or double click on the wpa_gui desktop application shortcut.

Fig. 138 Starting wpa_gui from Applications > Internet > wpa_gui#

Fig. 139 Starting wpa_gui from Desktop application shortcut#
Step 2: Understanding wpa_gui interface#
Let’s see the wpa_gui interface in detail,
Adapteris the WiFi interface device, it should bewlan0(on-board WiFi) by default.Networkshows the WiFi access pointSSIDif you are connected to that network.Current Statustab shows you network information if you are connected to any network.Click on
Connectto connect if not automatically done.Click on
Disconnectto disconnect/reset the connection.Click on
Scanto scan nearby WiFi access points.
Manage Networktab shows you all the saved networks and options to manage those.
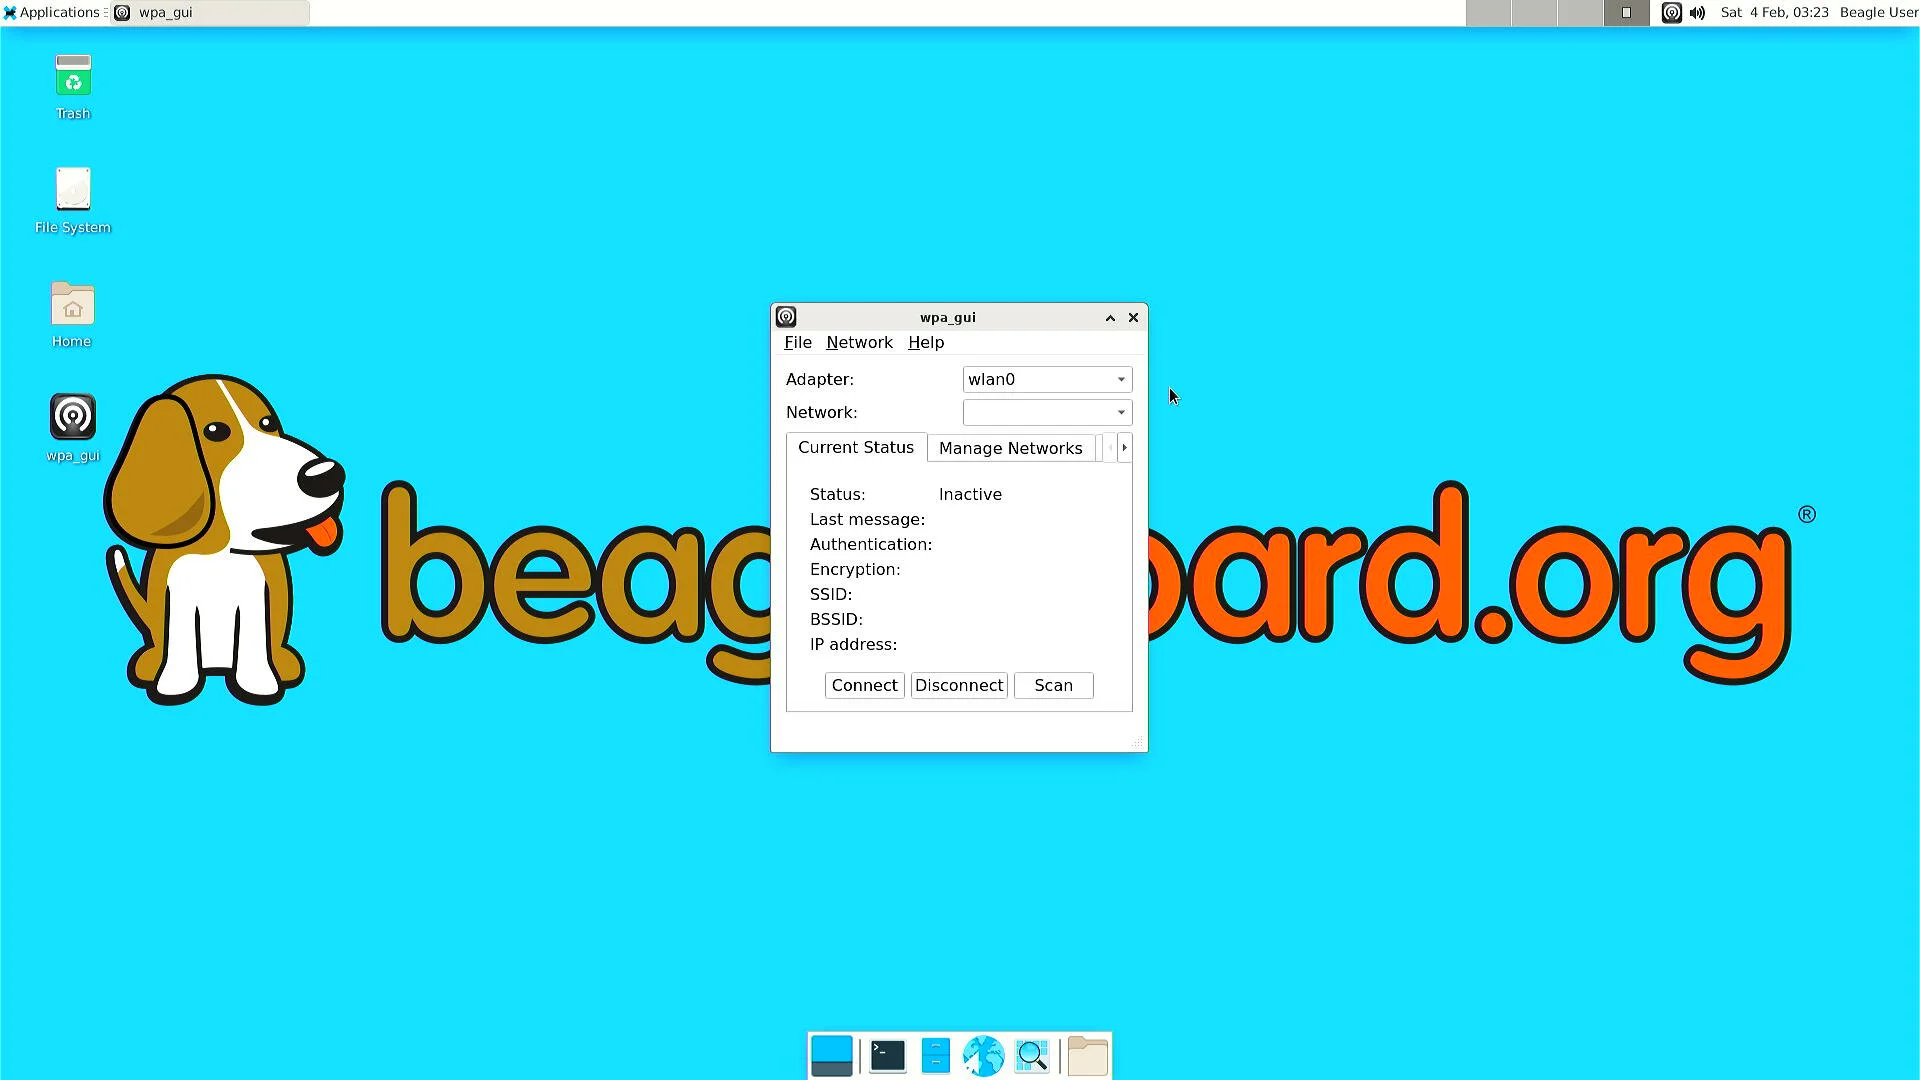
Fig. 140 wpa_gui interface#
Step 3: Scanning & Connecting to WiFi access points#
To scan the WiFi access points around you, just click on Scan button availale under
wpa_gui > Current Status > Scan.
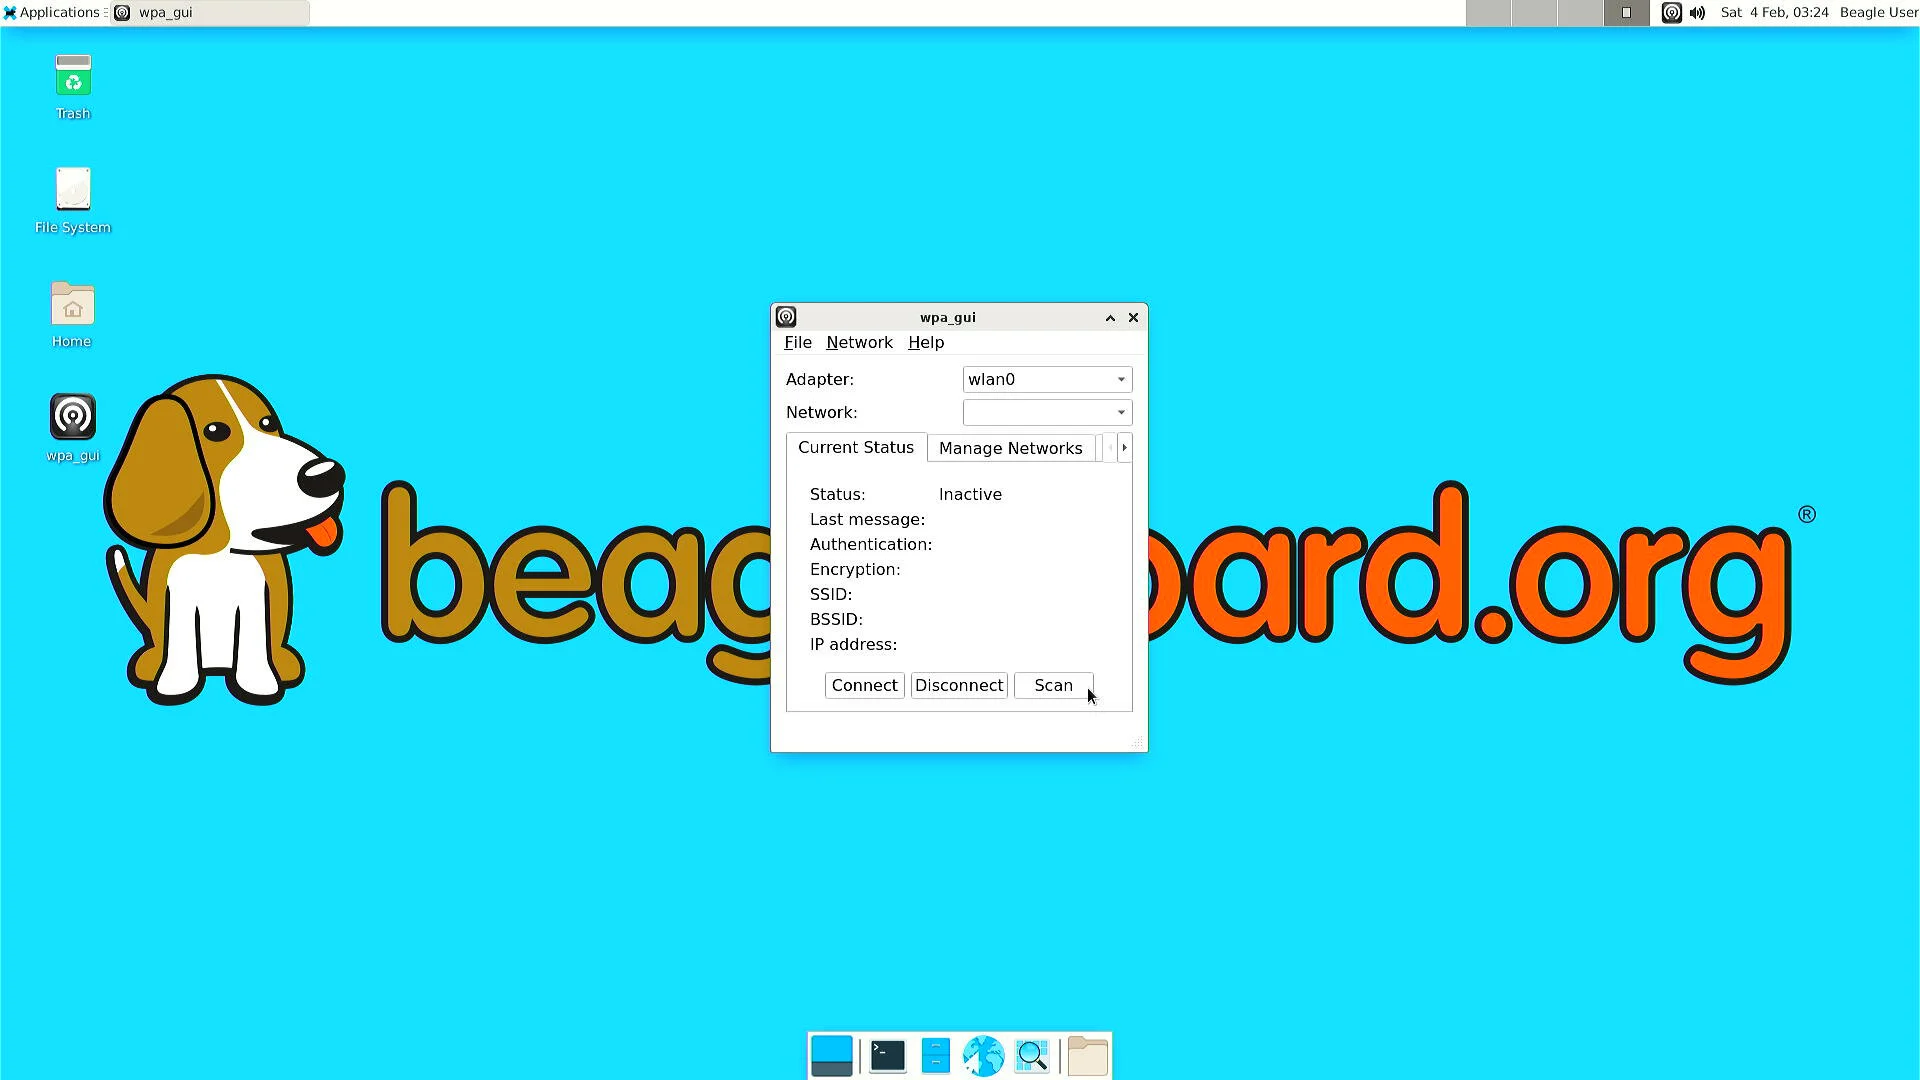
Fig. 141 Scanning WiFi access points#
A new window will open up with,
SSID (WiFi name)
BSSID
Frequency
Signal strength
flags
Now, you just have to double click on the Network you want to connect to as shown below.
Note
SSIDs and BSSIDs are not fully visible in screenshot below but you can change the column length to see the WiFi names better.
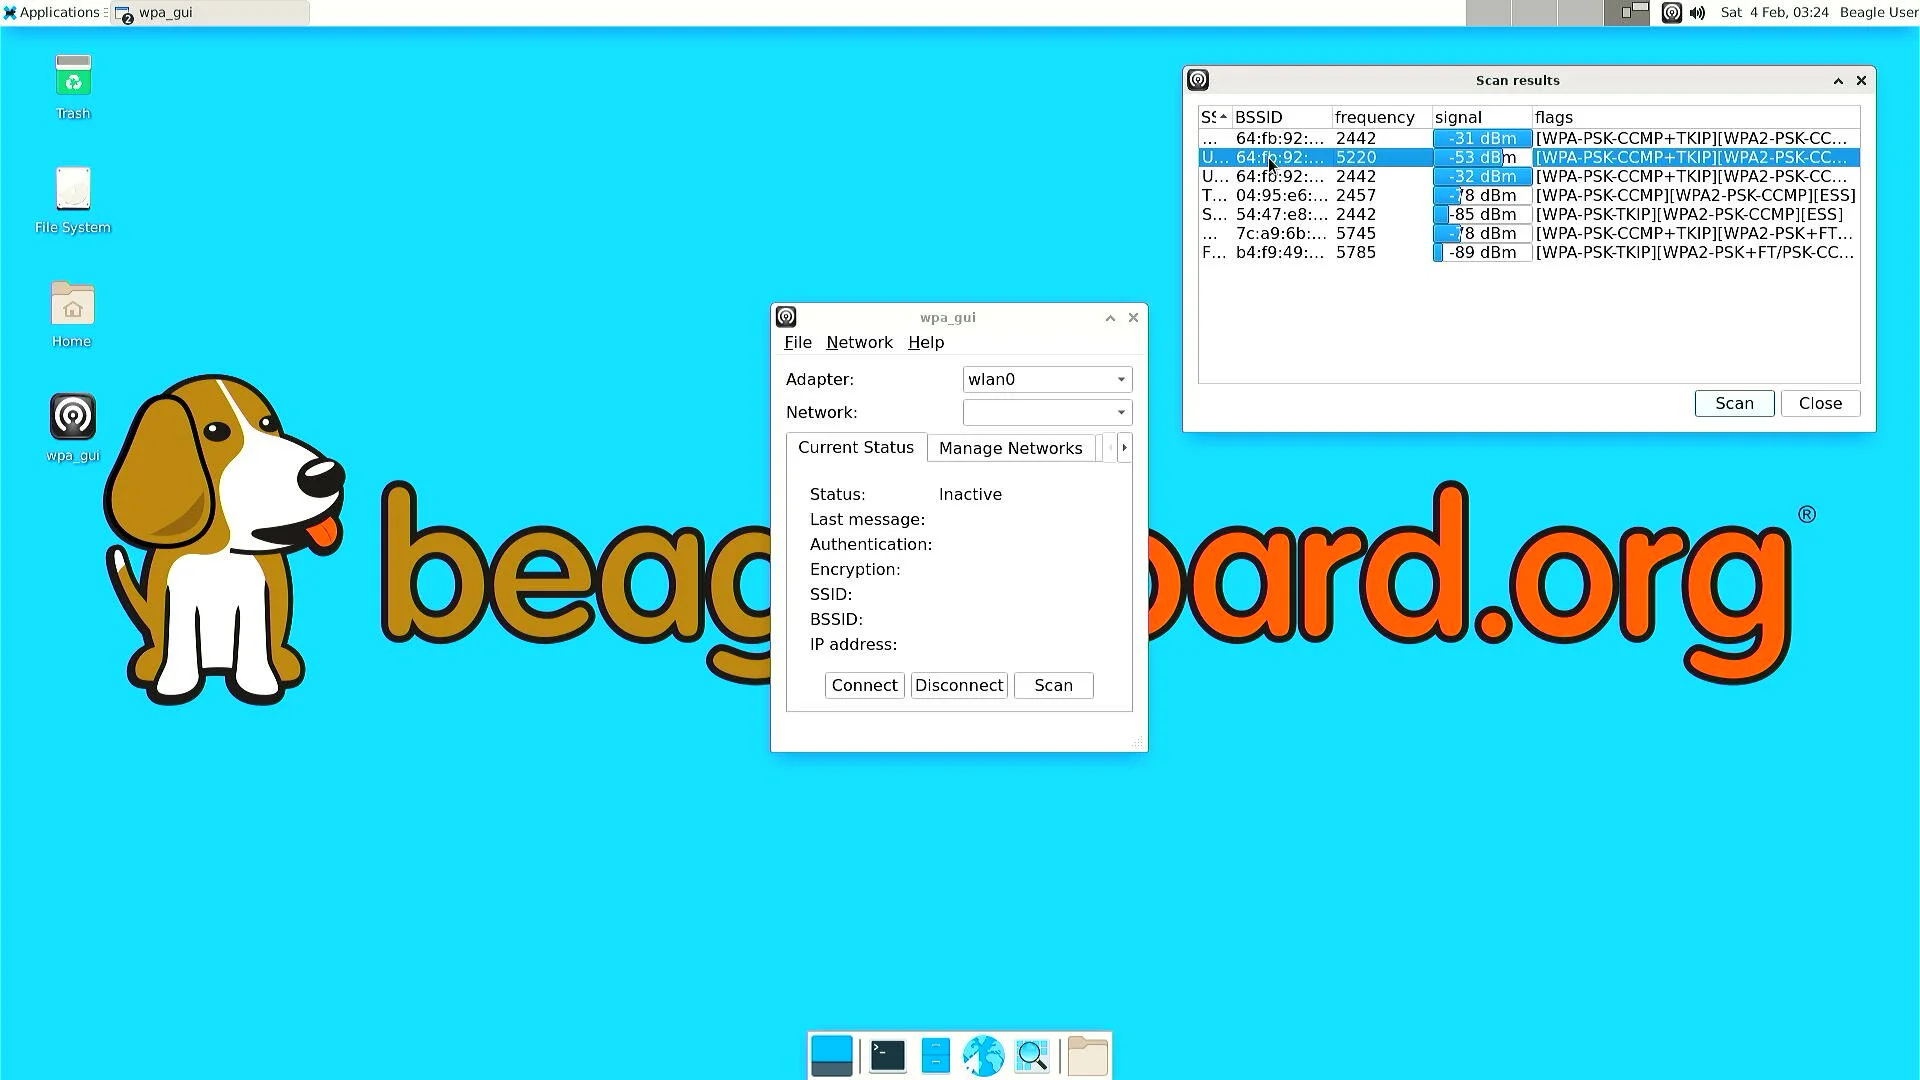
Fig. 142 Selecting WiFi access point#
Final step is to type your WiFi access point password under PSK input field and
click on Add (as shown in screenshot below) which will automatically connect
your board to WiFi (if password is correct).
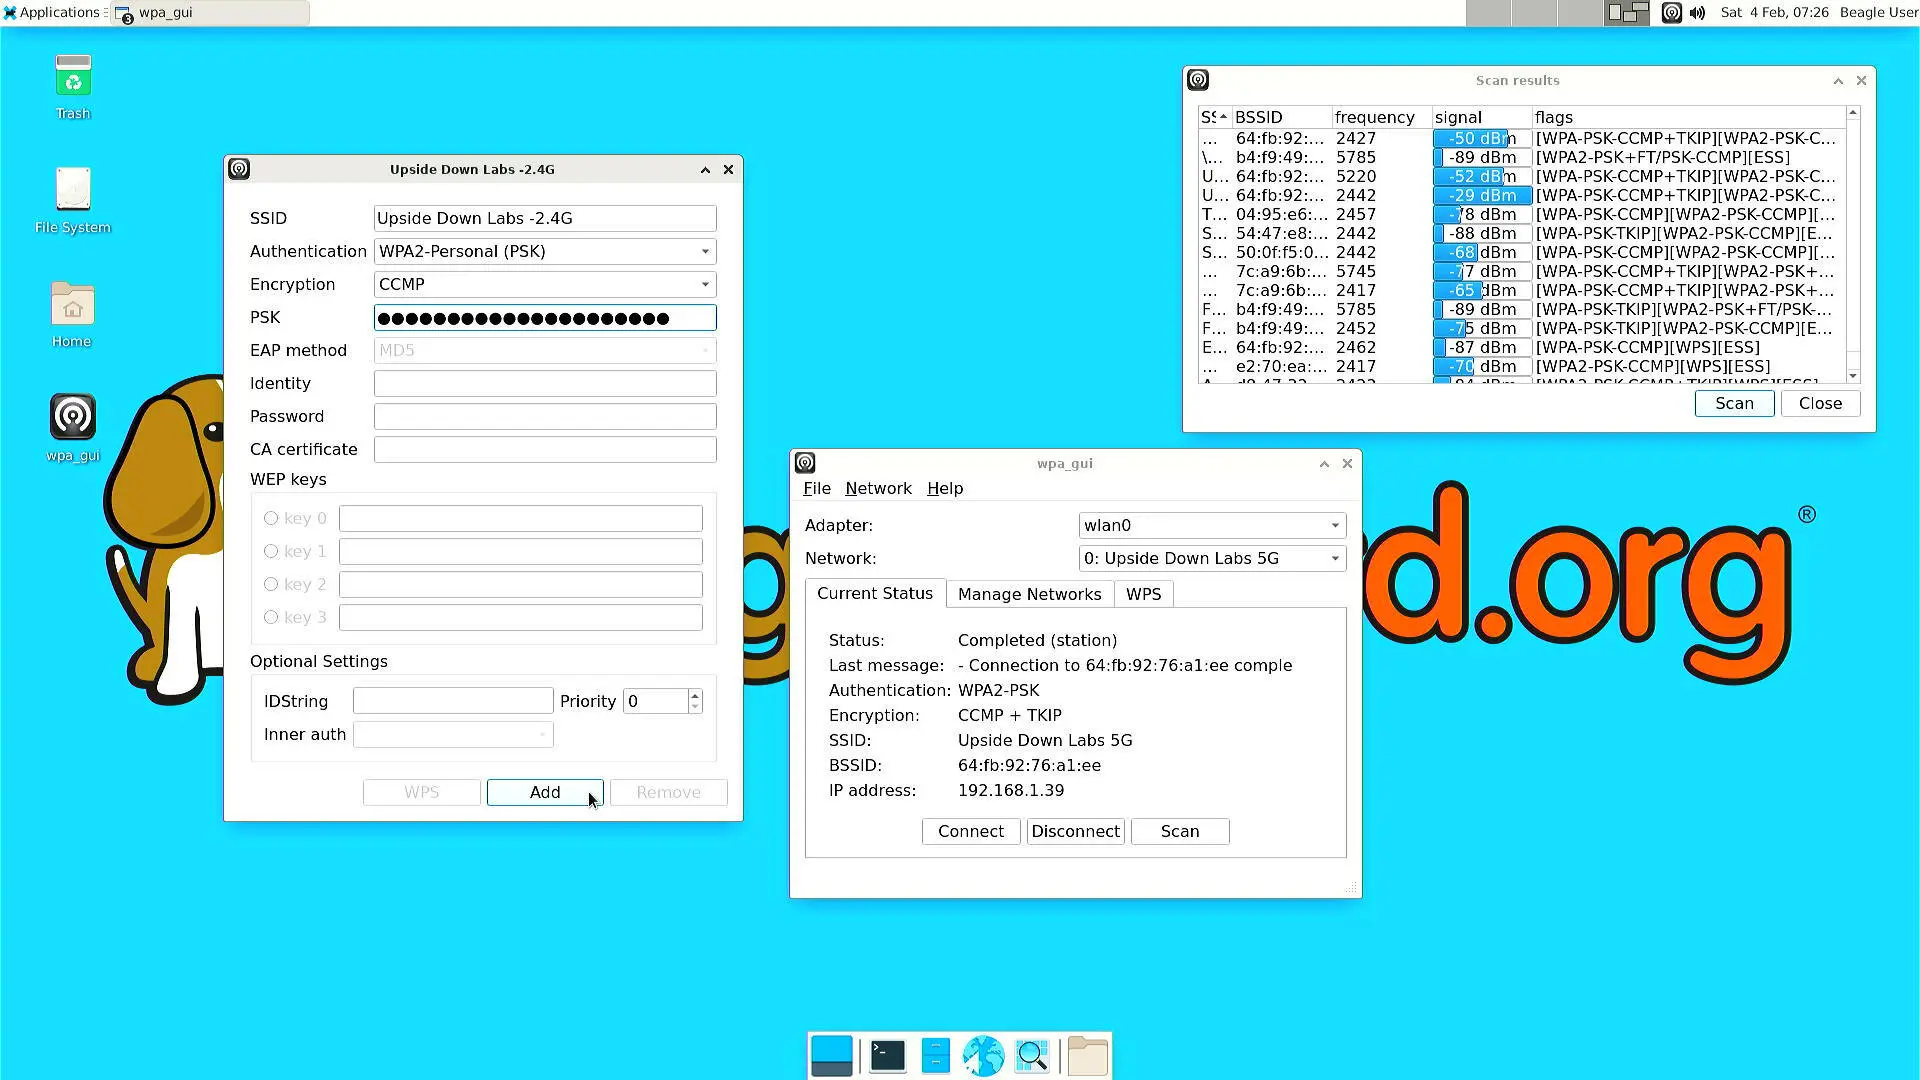
Fig. 143 Connecting to WiFi access point#
wpa_cli (shell)#
In commands shown below, swap out “68:ff:7b:03:0a:8a” and “mypassword” with your network BSSID and password, respectively.
debian@BeaglePlay:~$ wpa_cli scan
Selected interface 'wlan0'
OK
debian@BeaglePlay:~$ wpa_cli scan_results
Selected interface 'wlan0'
bssid / frequency / signal level / flags / ssid
68:ff:7b:03:0a:8a    5805    -49     [WPA2-PSK-CCMP][WPS][ESS]       mywifi
debian@BeaglePlay:~$ wpa_cli add_network
Selected interface 'wlan0'
1
debian@BeaglePlay:~$ wpa_cli set_network 1 bssid 68:ff:7b:03:0a:8a
Selected interface 'wlan0'
OK
debian@BeaglePlay:~$ wpa_cli set_network 1 psk '"mypassword"'
Selected interface 'wlan0'
OK
debian@BeaglePlay:~$ wpa_cli enable_network 1
Selected interface 'wlan0'
OK
debian@BeaglePlay:~$ ifconfig wlan0
wlan0: flags=4163<UP,BROADCAST,RUNNING,MULTICAST>  mtu 1500
        inet 192.168.0.245  netmask 255.255.255.0  broadcast 192.168.0.255
        inet6 fe80::6e30:2aff:fe29:757d  prefixlen 64  scopeid 0x20<link>
        inet6 2601:408:c083:b6c0::e074  prefixlen 128  scopeid 0x0<global>
        ether 6c:30:2a:29:75:7d  txqueuelen 1000  (Ethernet)
        RX packets 985  bytes 144667 (141.2 KiB)
        RX errors 0  dropped 0  overruns 0  frame 0
        TX packets 52  bytes 10826 (10.5 KiB)
        TX errors 0  dropped 0 overruns 0  carrier 0  collisions 0
Important
The single quotes around the double quotes are needed to make sure the double quotes are given to wpa_cli instructions. It expects to see them.
Note
For more information about wpa_cli instructions, see https://w1.fi/wpa_supplicant/
To make these changes persistent, you need to edit /etc/wpa_supplicant/wpa_supplicant-wlan0.conf. This is described in wpa_cli (XFCE) section.
wpa_cli (XFCE)#
Another way of connecting to a WiFi access point is to edit the wpa_supplicant configuration file.
Step 1: Open up termina#
Open up a terminal window either from Applications > Terminal Emulator Or from Task Manager.

Fig. 144 Open terminal from Applications > Terminal Emulator#

Fig. 145 Open terminal from Task Manager#
Step 2: Setup credentials#
To setup credentials of your WiFi access point follow these steps,
1. Execute sudo nano /etc/wpa_supplicant/wpa_supplicant-wlan0.conf,
which will open up wpa_supplicant-wlan0.conf inside nano (terminal based) text editor.
1. Edit wpa_supplicant-wlan0.conf to add SSID (WiFi name) & PSK (WiFi password) of your WiFi access point.
....
network={
        ssid="WiFi Name"
        psk="WiFi Password"
        ....
}
Now save the details using
ctrl + Othen enter.To exit out of the
nanotext editor usectrl + X.
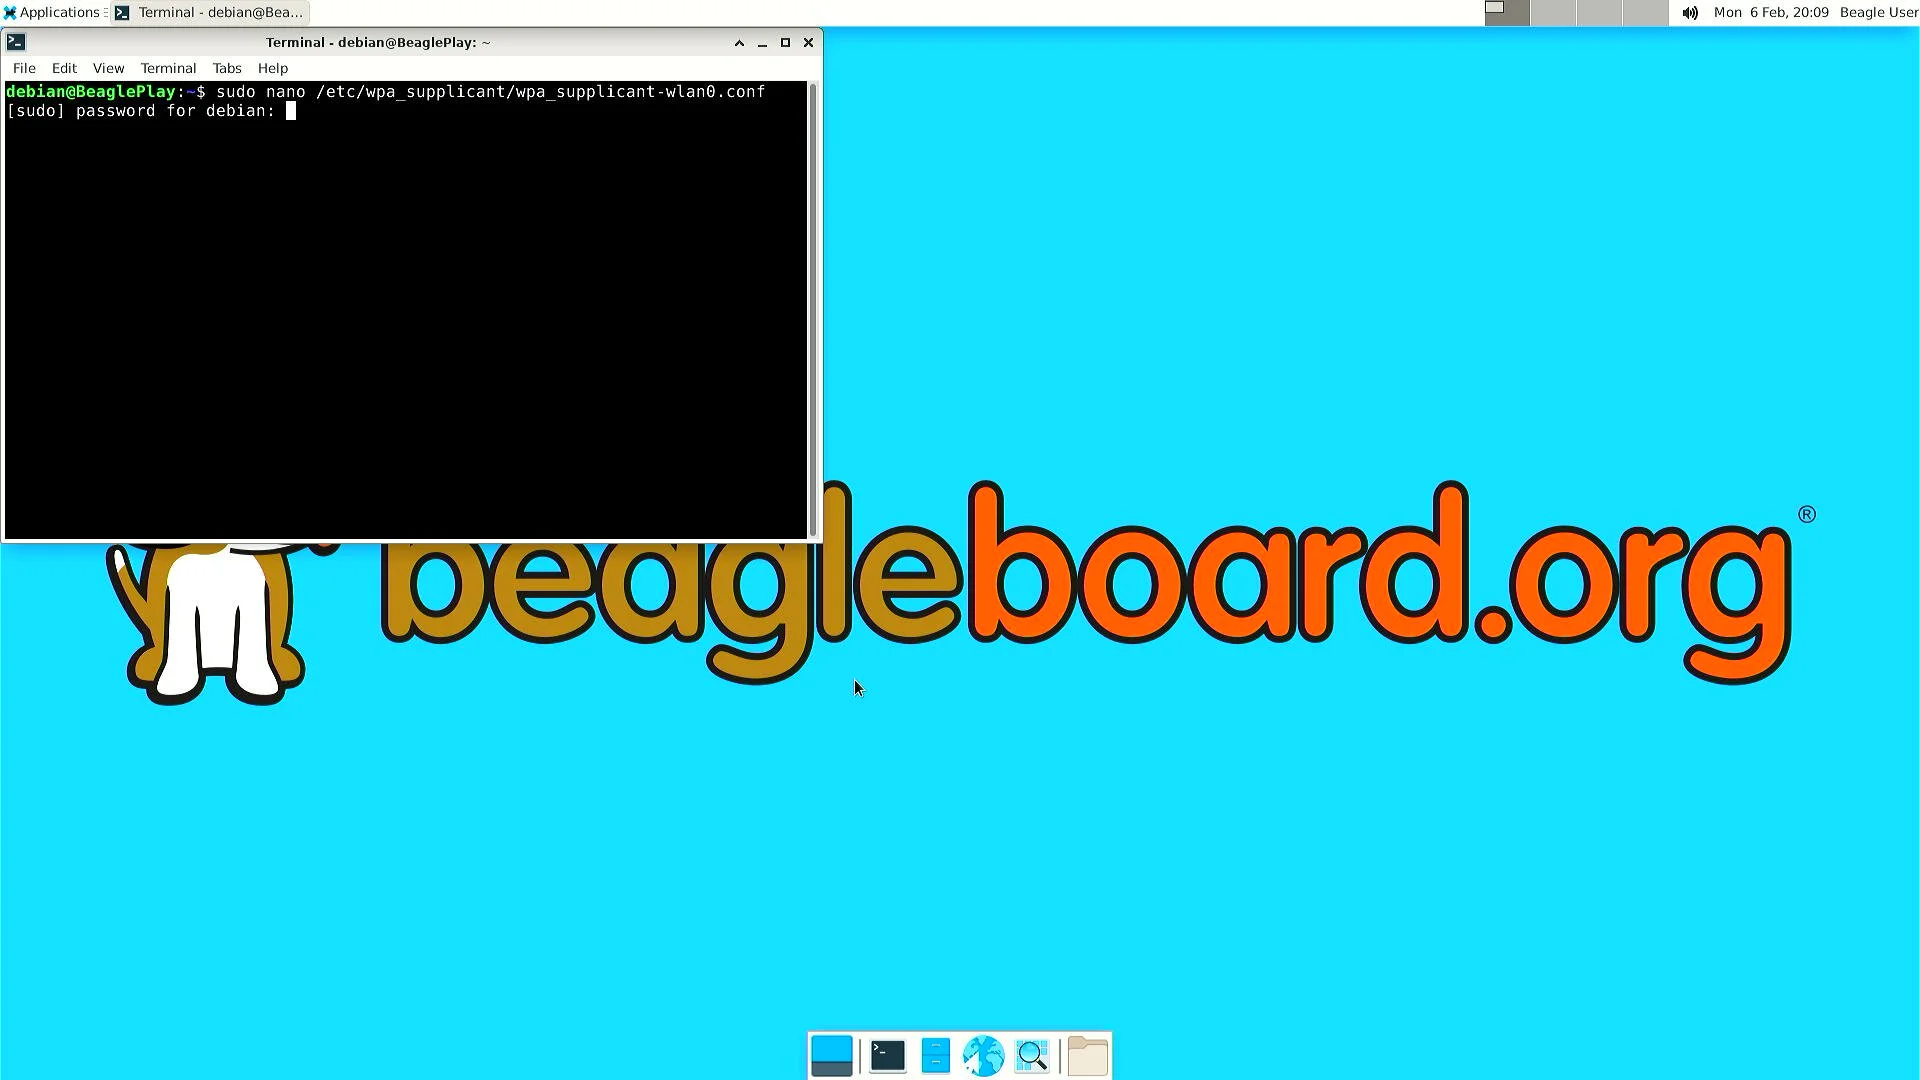
Fig. 146 Run: $ sudo nano /etc/wpa_supplicant/wpa_supplicant-wlan0.conf#
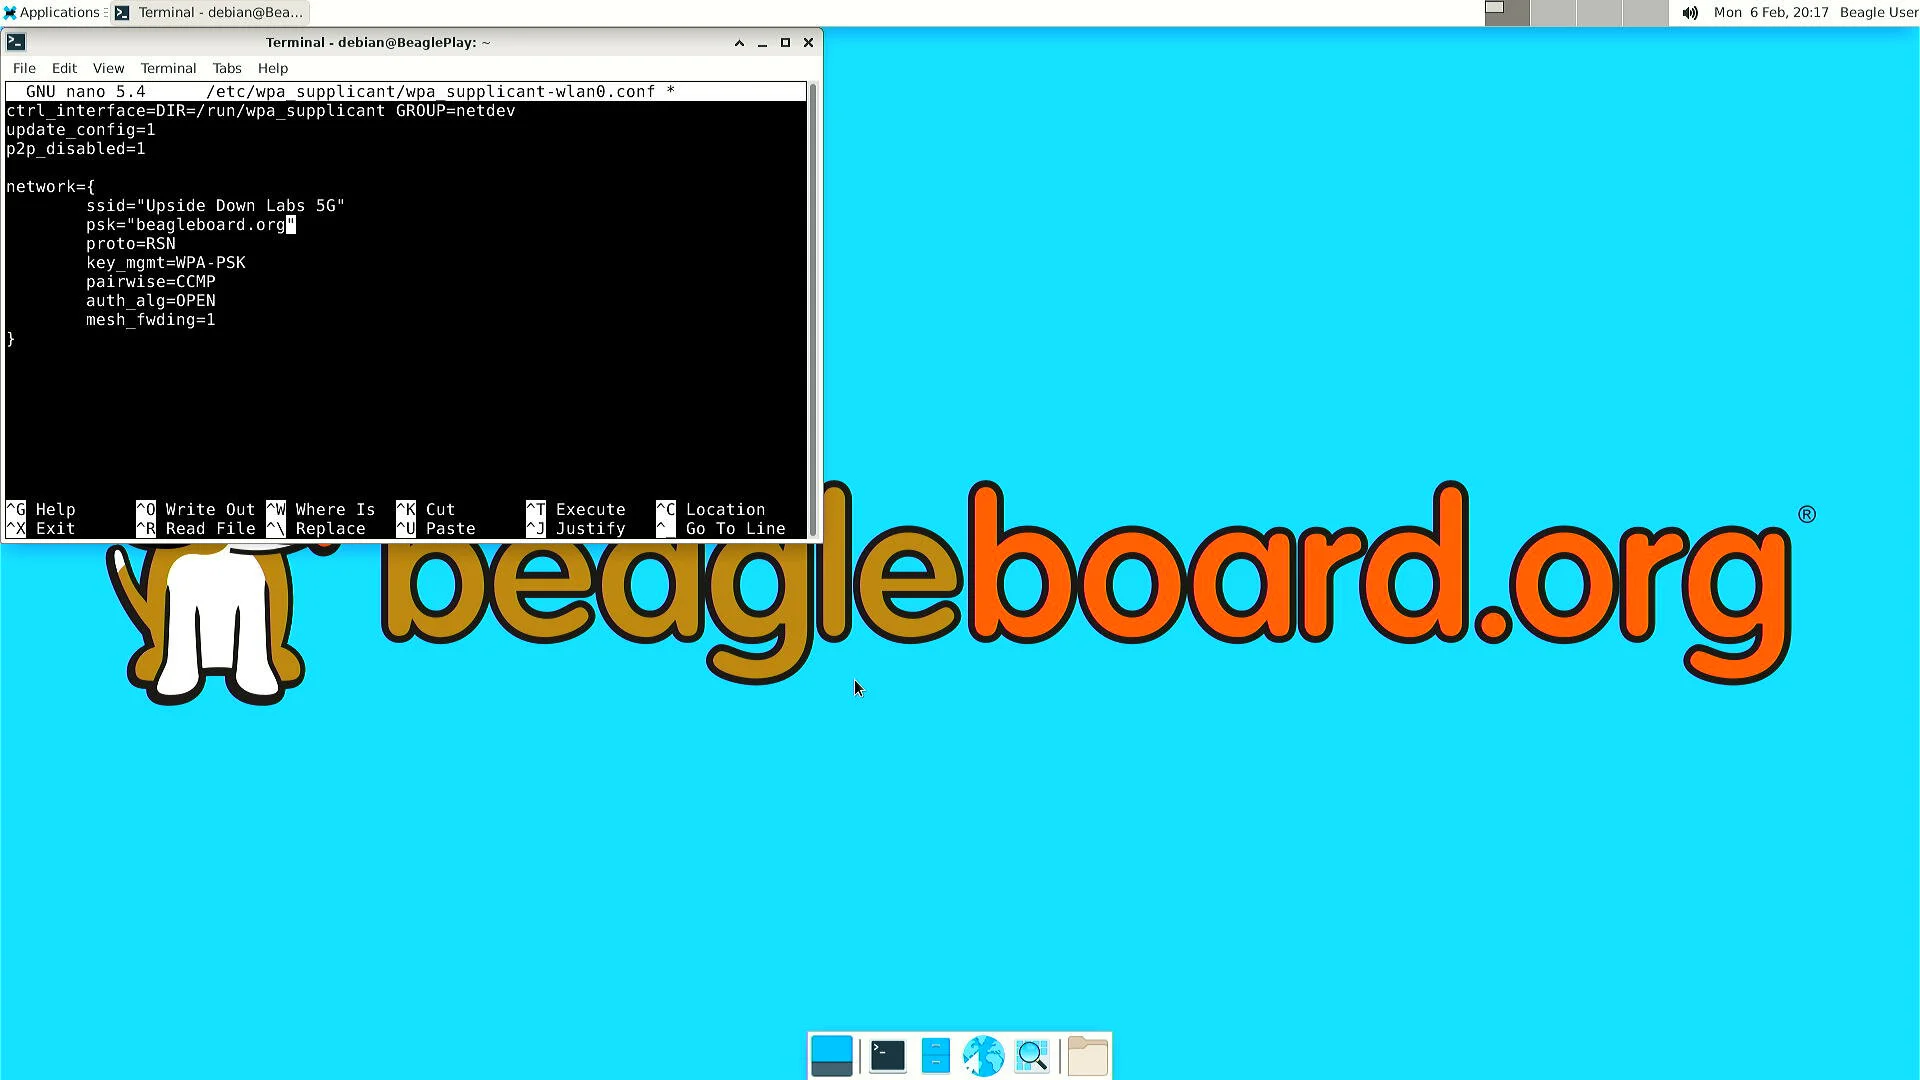
Fig. 147 Add SSID and PSK#
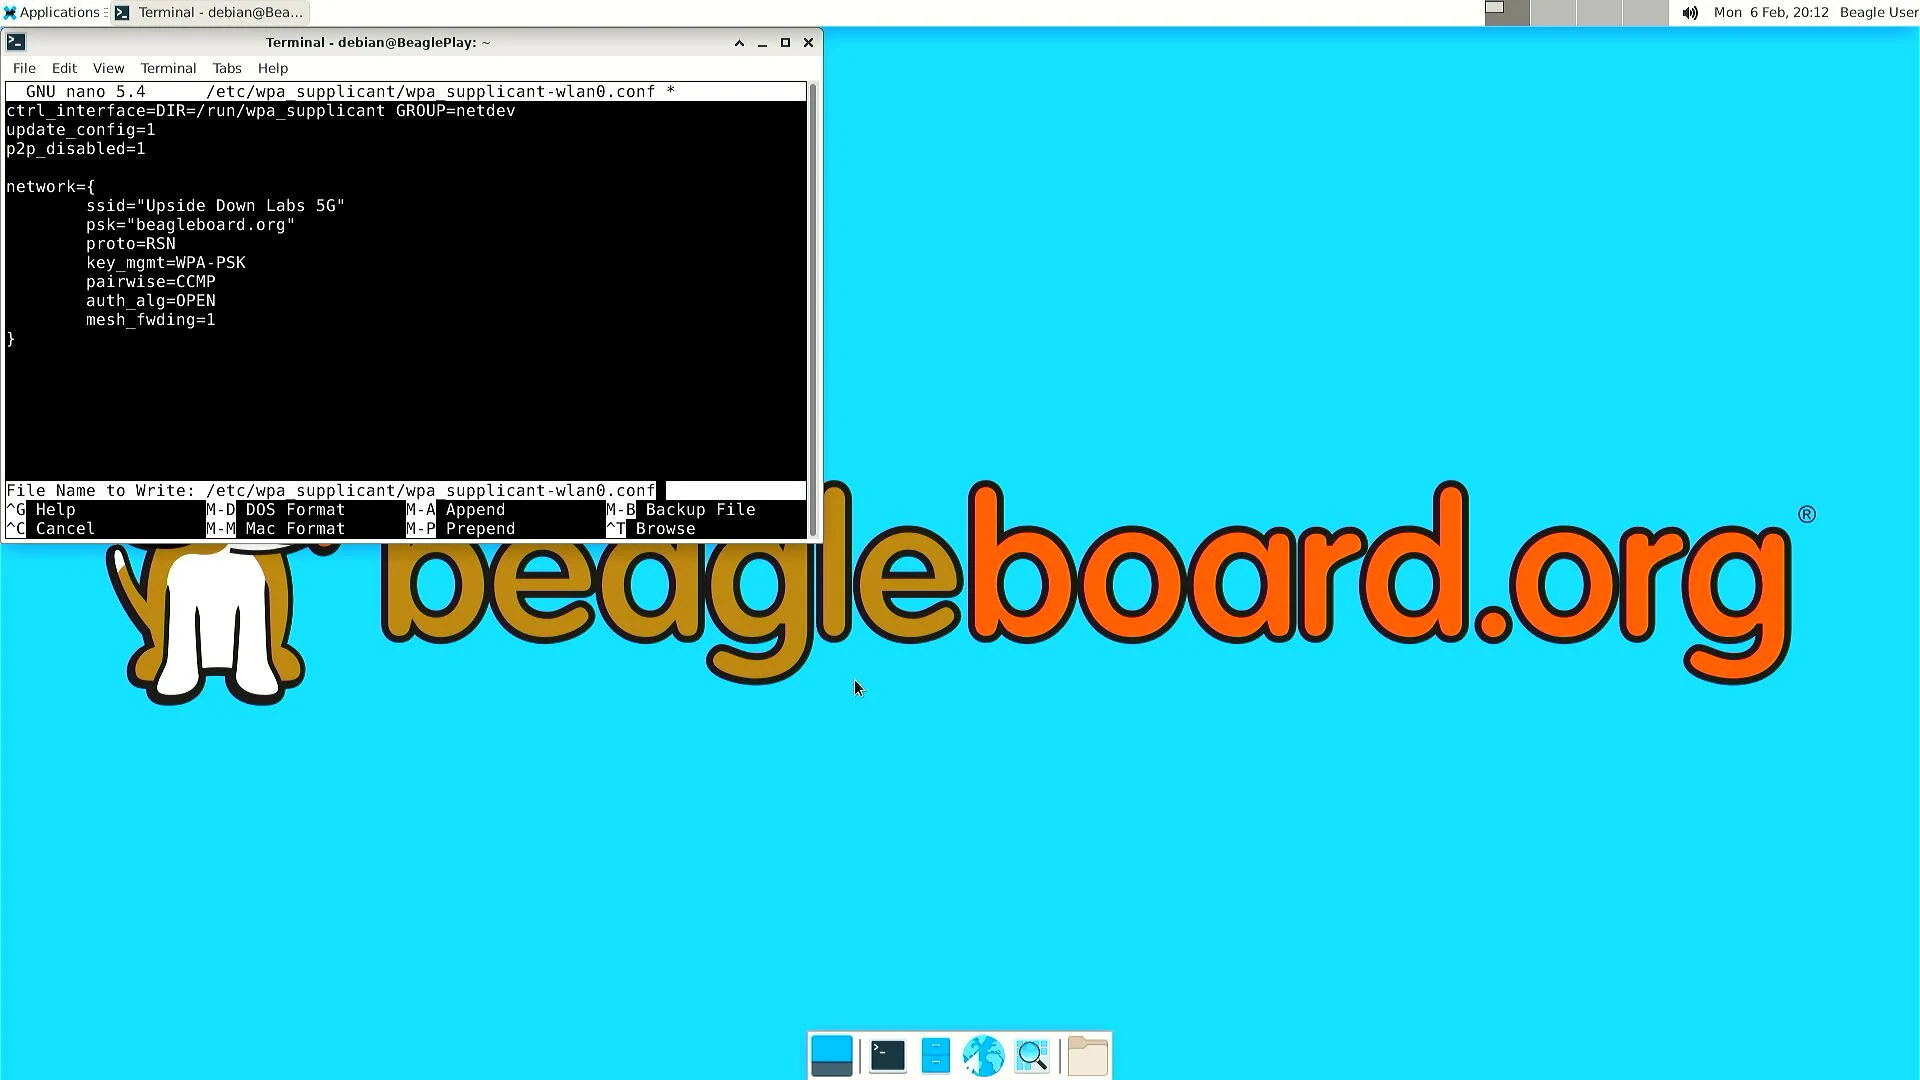
Fig. 148 Save credentials (ctrl + O) and Exit (ctrl + X)#
Step 3: Reconfigure wlan0#
The WiFi doesn’t automatically connect to your WiFi access point
after you add the credentials to wpa_supplicant-wlan0.conf.
To connect you can either execute
sudo wpa_cli -i wlan0 reconfigureOr Reboot your device by executing
rebootinside your terminal window.Execute
ping 8.8.8.8to check your connection. Usectrl + Cto quit.
debian@BeaglePlay:~$ ping 8.8.8.8
PING 8.8.8.8 (8.8.8.8) 56(84) bytes of data.
64 bytes from 8.8.8.8: icmp_seq=1 ttl=118 time=5.83 ms
64 bytes from 8.8.8.8: icmp_seq=2 ttl=118 time=7.27 ms
64 bytes from 8.8.8.8: icmp_seq=3 ttl=118 time=5.30 ms
64 bytes from 8.8.8.8: icmp_seq=4 ttl=118 time=5.28 ms
64 bytes from 8.8.8.8: icmp_seq=5 ttl=118 time=9.04 ms
64 bytes from 8.8.8.8: icmp_seq=6 ttl=118 time=7.52 ms
64 bytes from 8.8.8.8: icmp_seq=7 ttl=118 time=5.39 ms
64 bytes from 8.8.8.8: icmp_seq=8 ttl=118 time=5.94 ms
^C
--- 8.8.8.8 ping statistics ---
8 packets transmitted, 8 received, 0% packet loss, time 7008ms
rtt min/avg/max/mdev = 5.281/6.445/9.043/1.274 ms
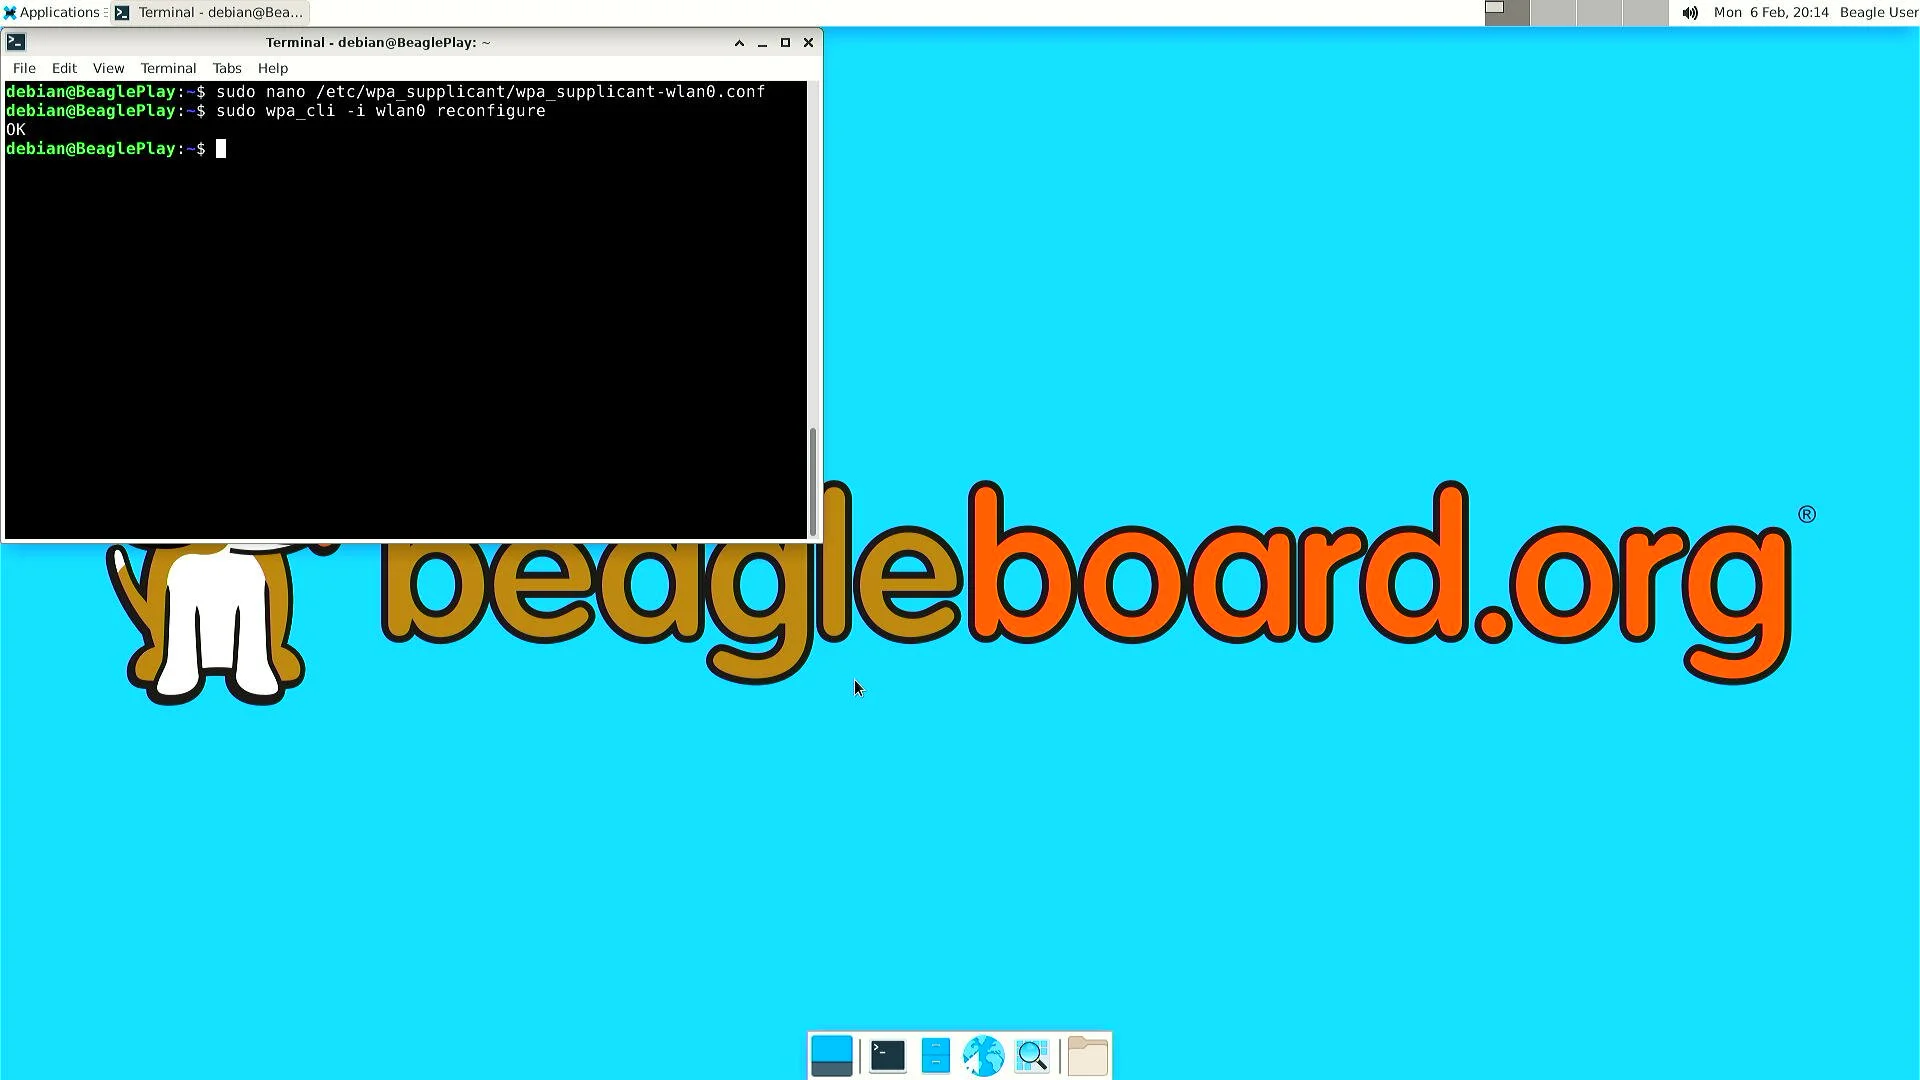
Fig. 149 Connect to WiFi by running $ sudo wpa_cli -i wlan0 reconfigure#
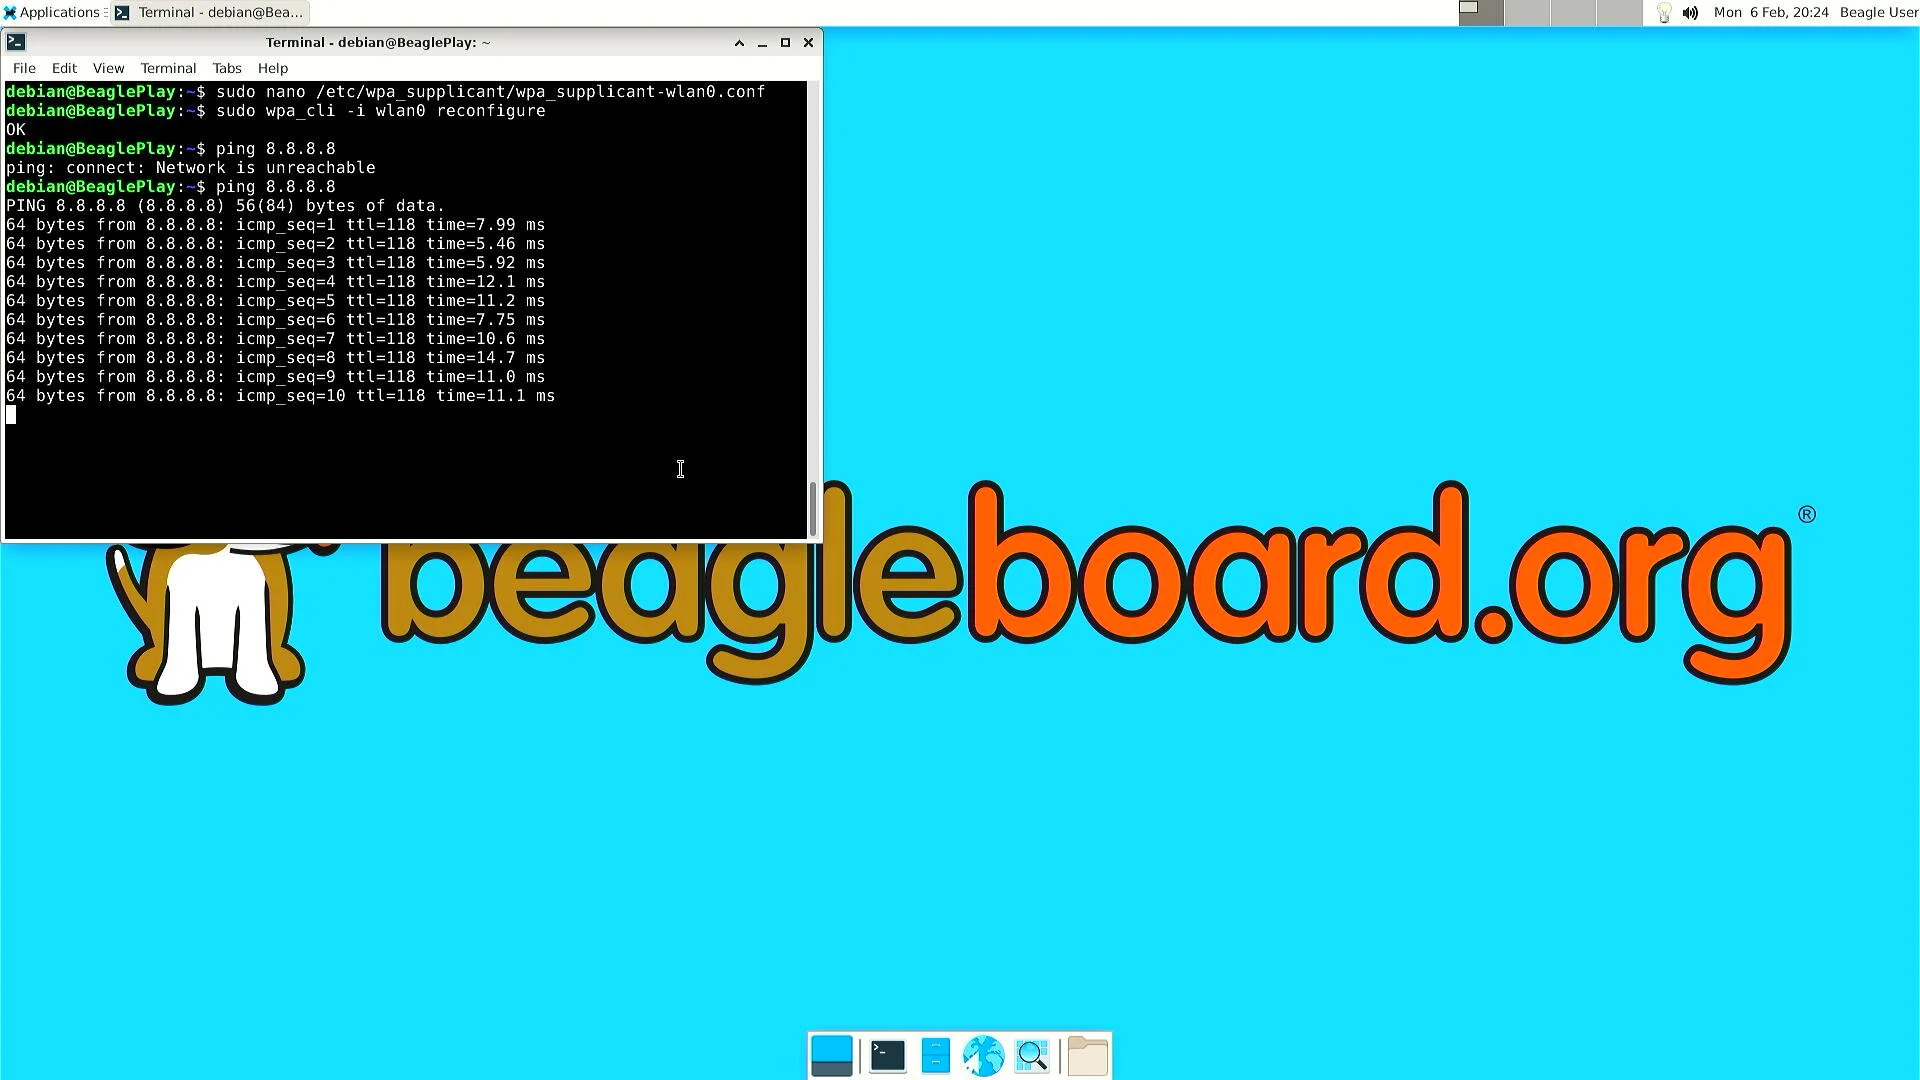
Fig. 150 To check connection try running $ ping 8.8.8.8#
Disabling the WIFI Access Point#
In certain situations, such as running HomeAssistant, you may chose to connect your BeaglePlay to the internet via Ethernet. In this case, it may be desireable to disable it’s Wifi access point so that users outside the local network aren’t able to connect to it.
The Wifi Access Point that BeaglePlay provides is started using uDev rules. created by the bb-wlan0-defaults package
You can simply remove the bb-wlan0-defaults package:
sudo apt remove bb-wlan0-defaults
Now just reboot and the Wifi Access point should no longer start.
You can also disable it by removing the two following udev rule files:
rm /etc/udev/rules.d/81-add-SoftAp0-interface.rules
rm /etc/udev/rules.d/82-SoftAp0-start-hostpad.rules
The issue with doing this latter option is that if you later update your OS, the bb-wlan0-defaults may get updated as well and re-add the rules.
Re-Enabling the WIFI Access Point#
Conversely, you can re-enable the access point by re-installing the bb-wlan0-default package.
sudo apt install bb-wlan0-defaults --reinstall
Now just reboot.
Todo
Add notes on changing SSID/Password
